Electrolyte Robot
For our second project in Physical Computing for Spring 2025, the goal was to design and build a device that either helps or humorously doesn't help with a daily task. We were required to include at least one input, one output, and a 3D-printed component designed by us.
I decided to focus on something I do every day: mixing electrolytes into water. Normally, I unscrew the container, scoop the powder, pour it into a glass, and stir it with a spoon. It's a simple task, but one that felt like the perfect opportunity to automate. I set out to design a device that could dispense the electrolytes into the water and stir the contents thoroughly without the use of any sticks or spoons going into the liquid—essentially a mini robot version of my daily routine.
The idea pushed me to explore 3D printing in a more advanced way, as well as work with servo motors, breadboard circuitry, buttons, and Python code using the Adafruit Circuit Playground Express. The result was a fully functional prototype that, despite the power limitations of the motors, successfully carried out the task. This project became a great test of my planning, creative thinking, and technical execution—and ultimately, a rewarding example of how hardware and code can work together to solve real (or not-so-real) problems.
My daily task
Getting Started
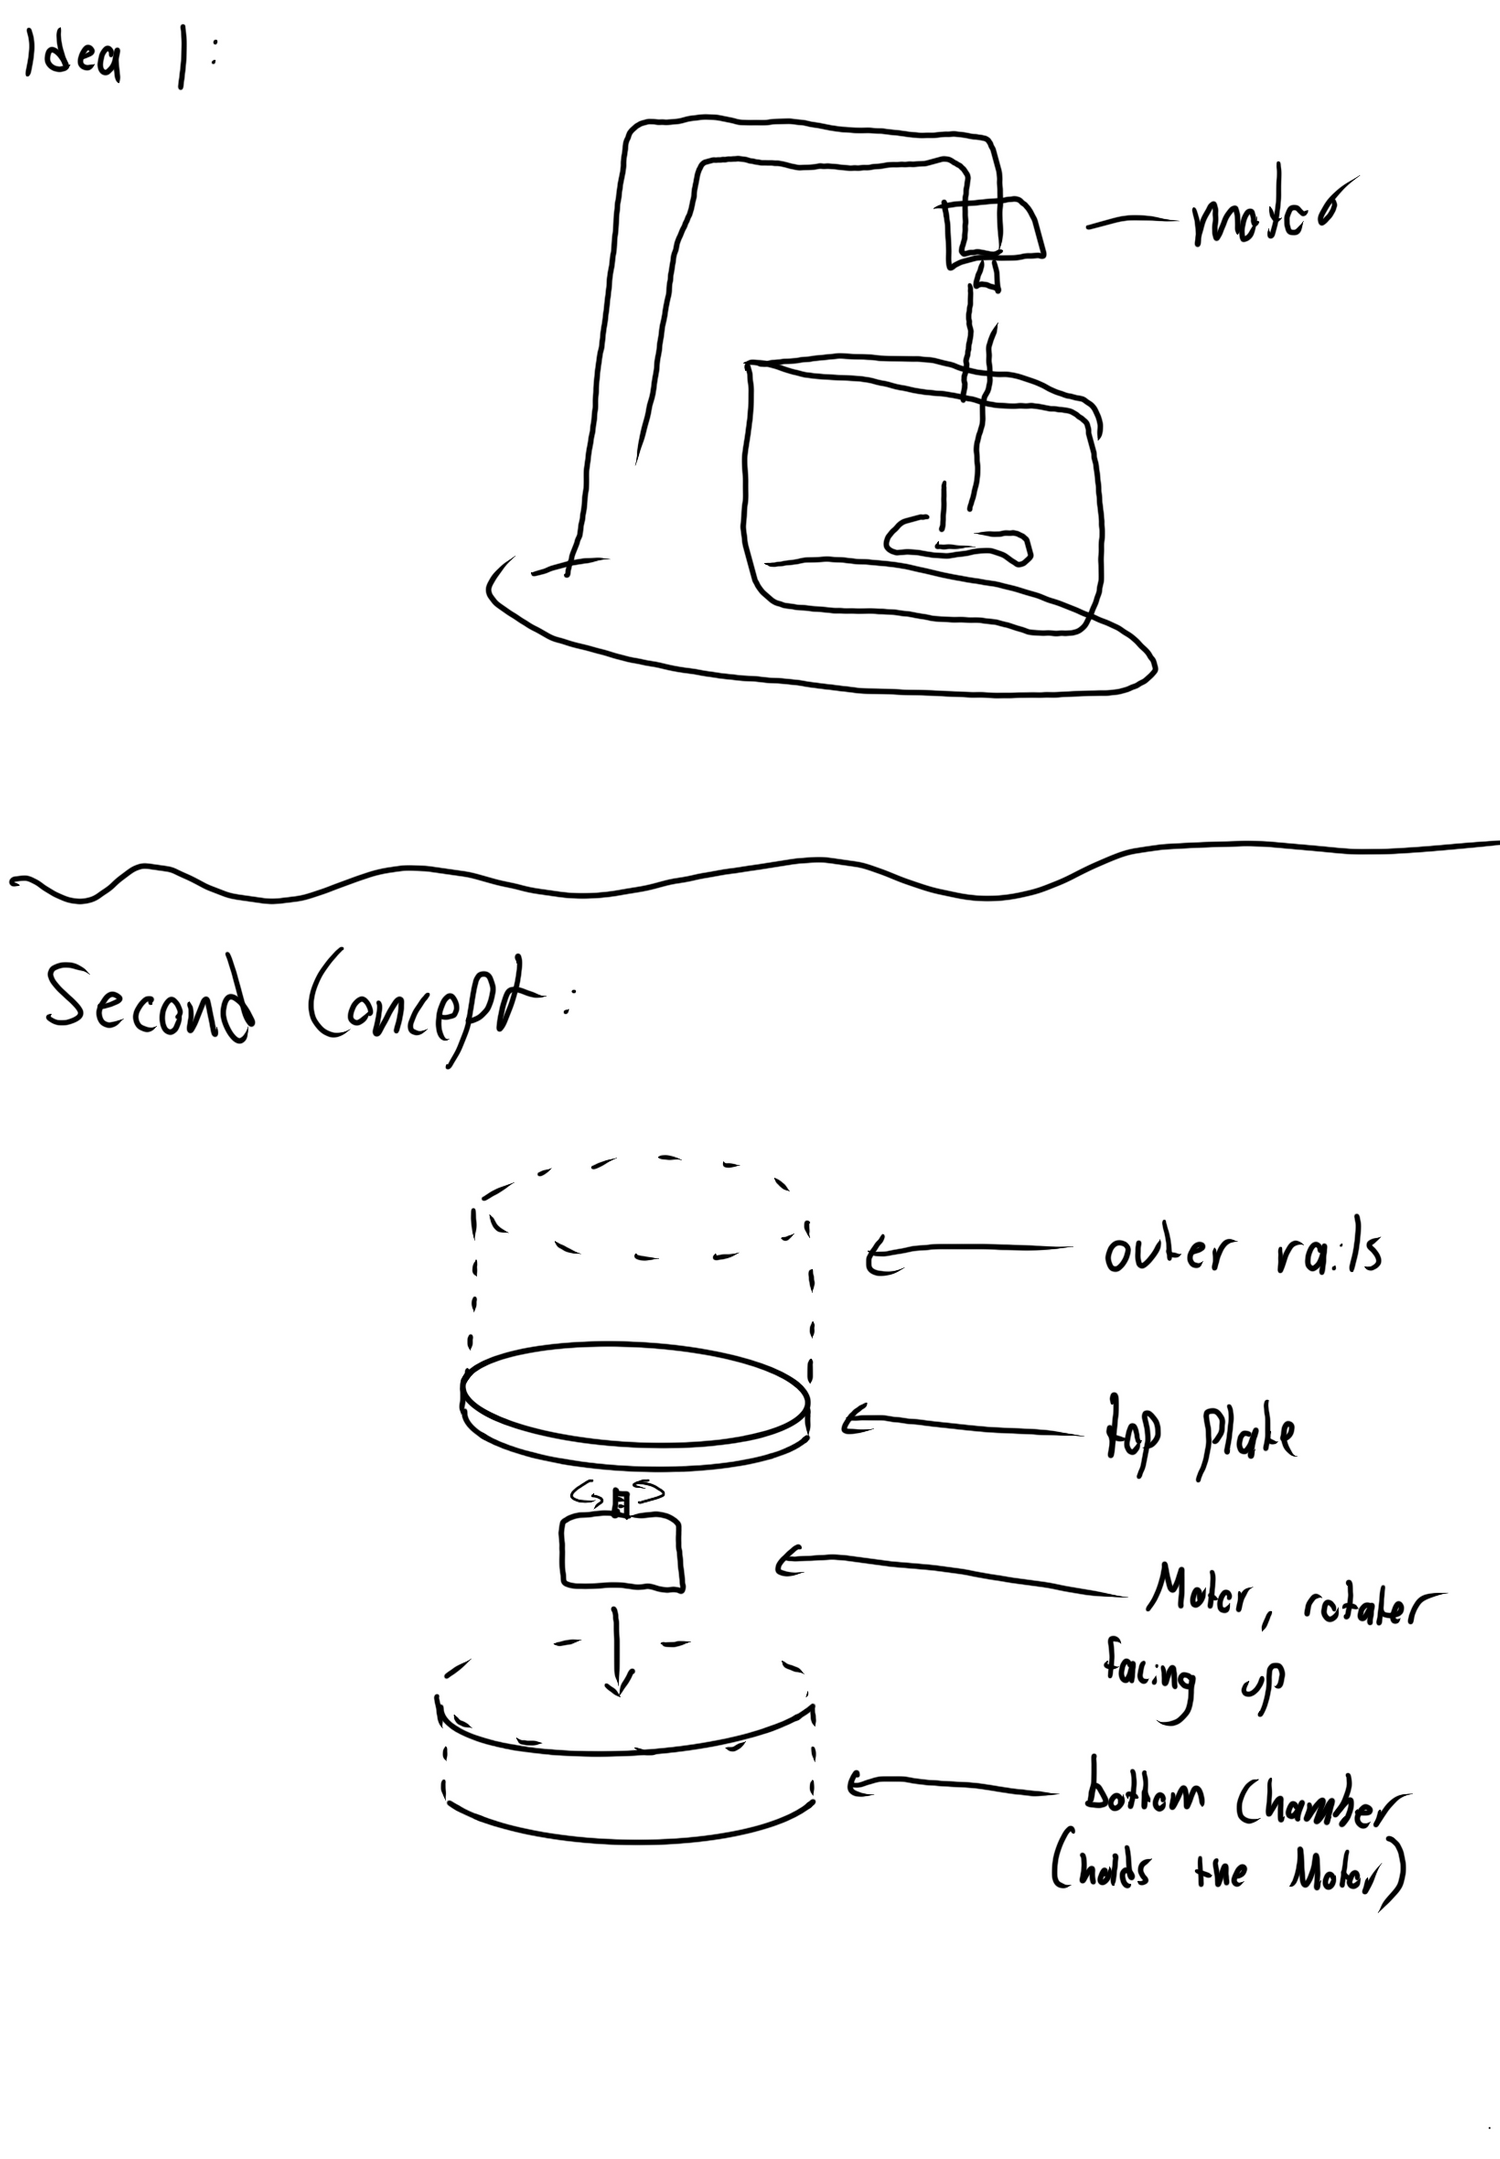
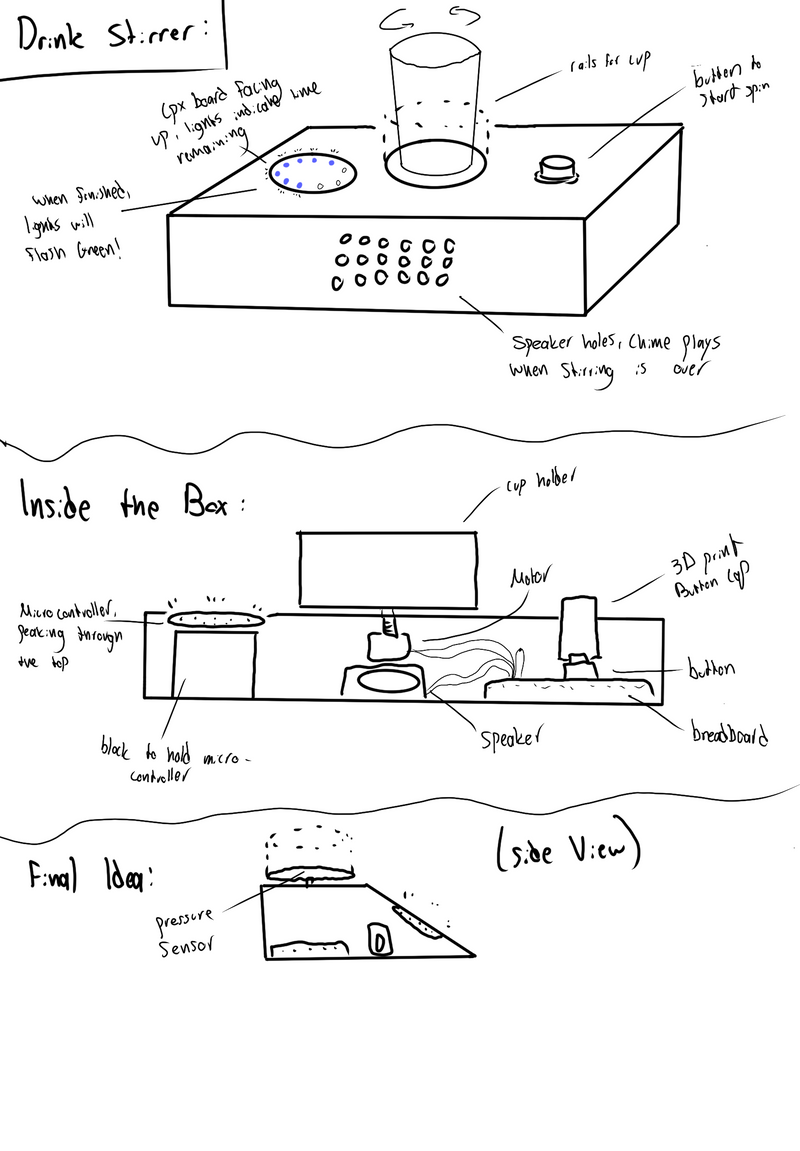
The first step in my process was sketching out every idea that came to mind. I focused on how I could get a motor to mix water effectively, but I was especially drawn to the idea of using a non-invasive mixing method. I found inspiration in a video of a drink mixer that spins the entire cup while keeping it secure with a border—simple, effective, and exactly the kind of mechanism I wanted to replicate.
I had a lot of creative vision for how the robot could look and behave, but I knew I needed to prioritize the functional requirements over the non-functional ones to make sure the project actually worked. I wanted it to be more than just a cool idea—I wanted it to reliably perform its task.
To make the concept more engaging, I started adding new features to the design. That's when I decided the robot shouldn't just mix the drink—it should also dispense the electrolyte powder. I sketched out different ways to make that work, laying the groundwork for a dual-function robot that felt both fun and functional.
Planning The Build
Materials:
- 3D printed material (PLA)
- Hot glue
- Scotch tape
- Exacto knife
- Starbucks large cup
- Plastic ginger shot bottle
- Plastic Straw
- Digital caliper
- Circuit Playground Express board
- Alligator to male wires
- Male to male wires
- 2 servo motors
- Breadboard
- Button
First Step:
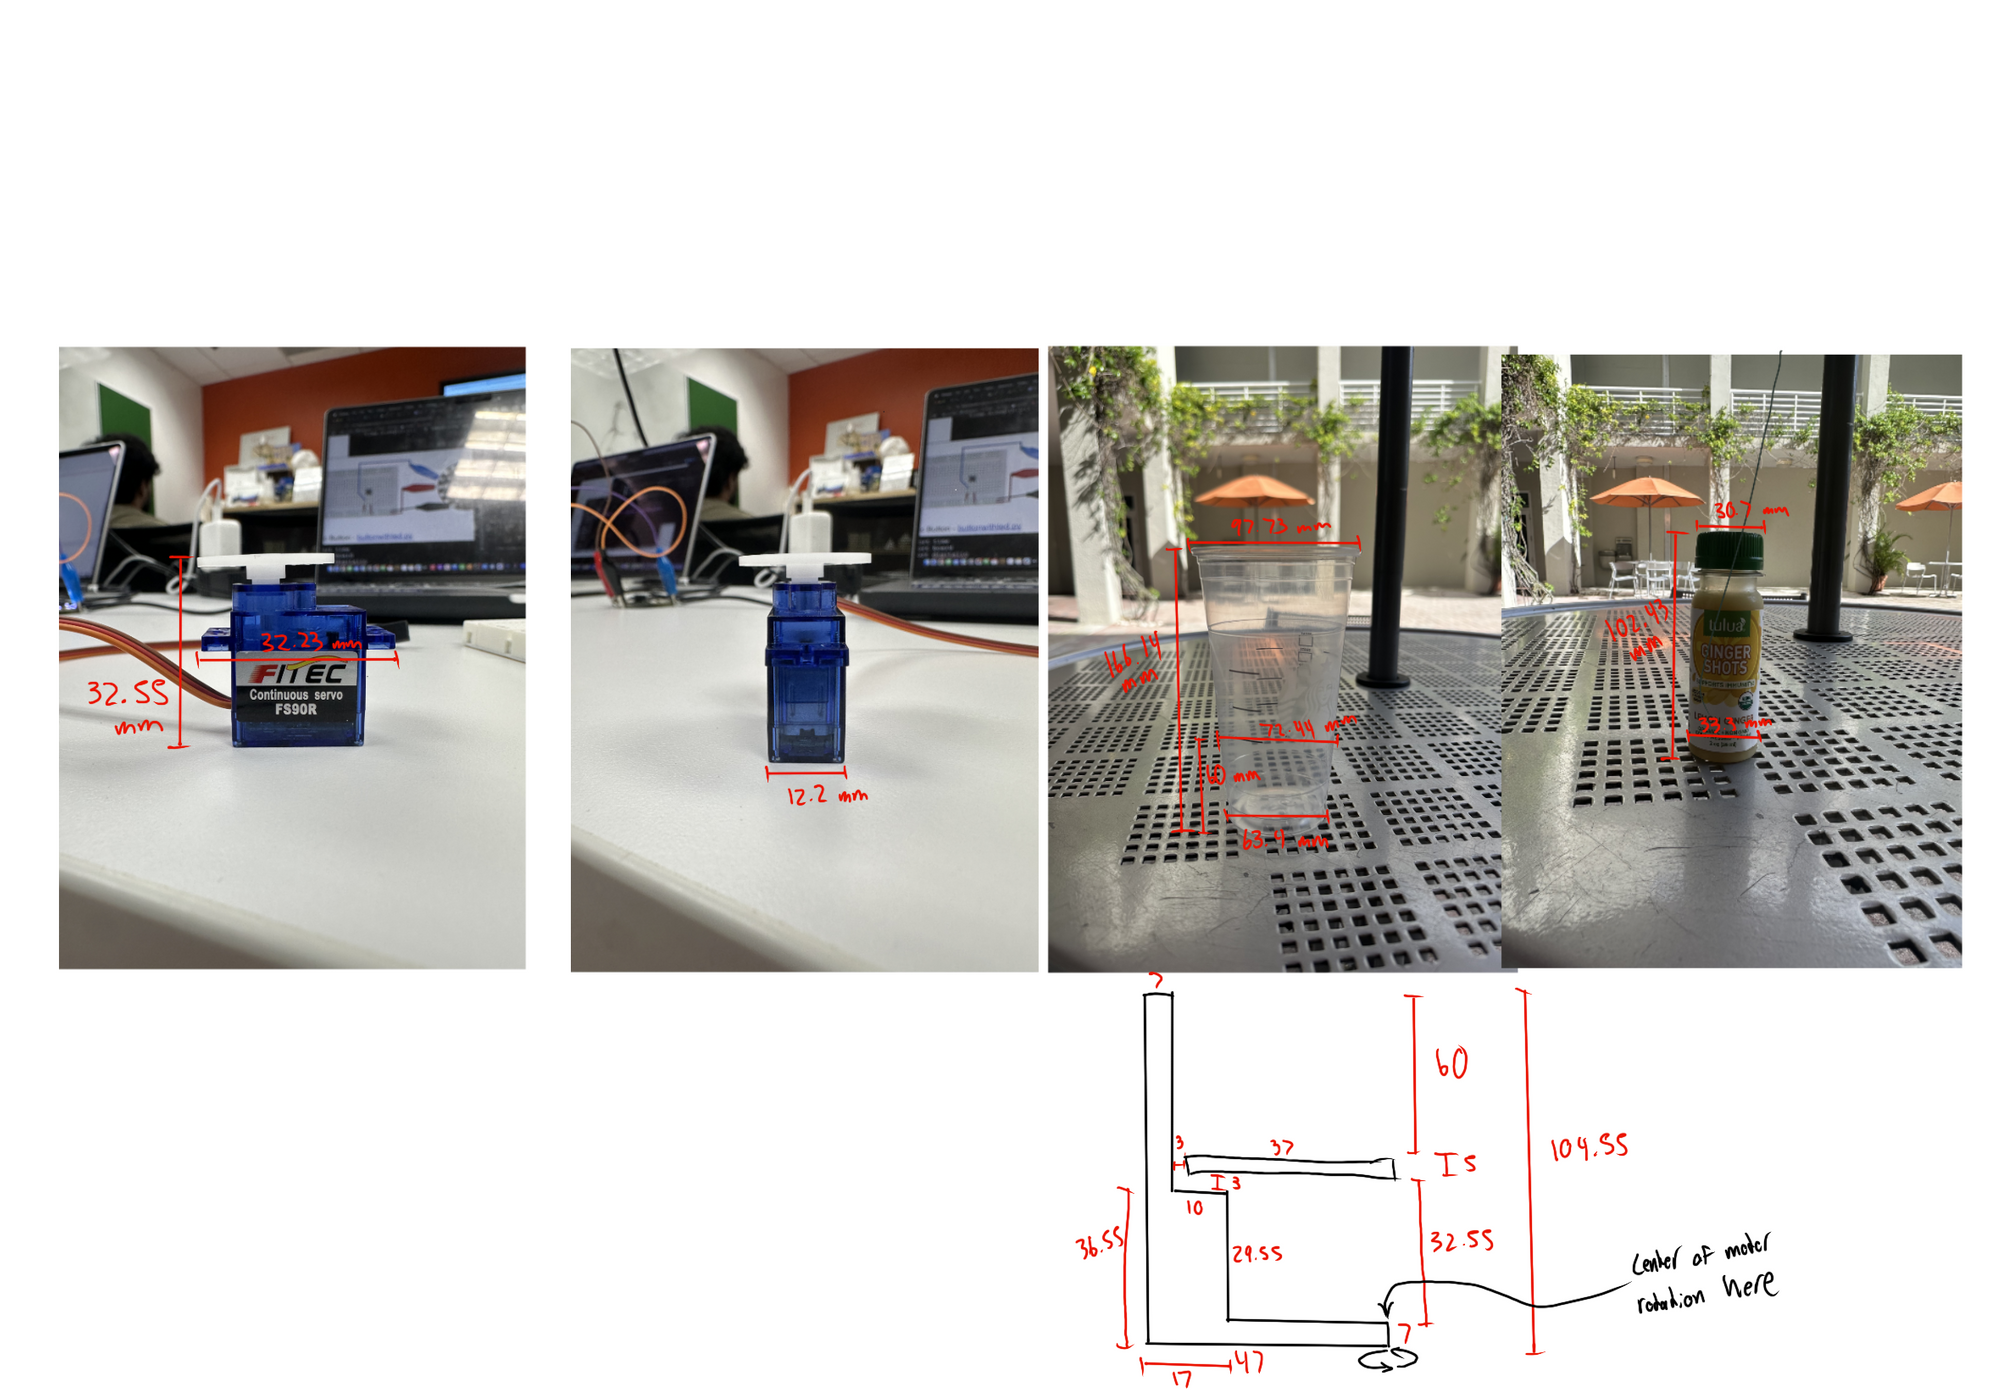
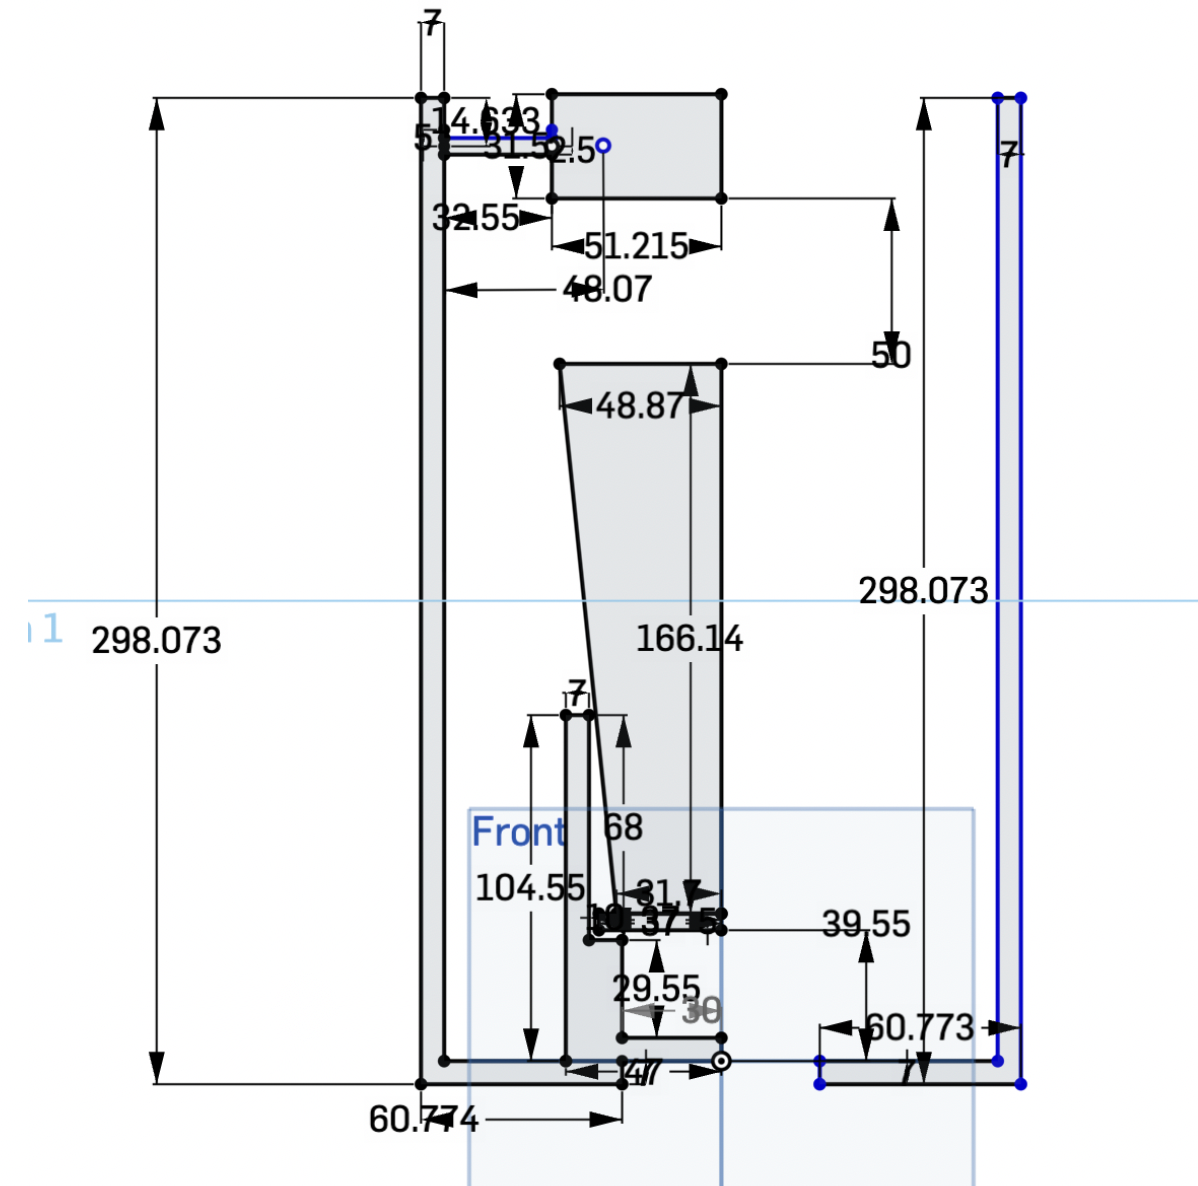
- Measured servos, cup, and bottle using digital caliper to inform 3D model dimensions
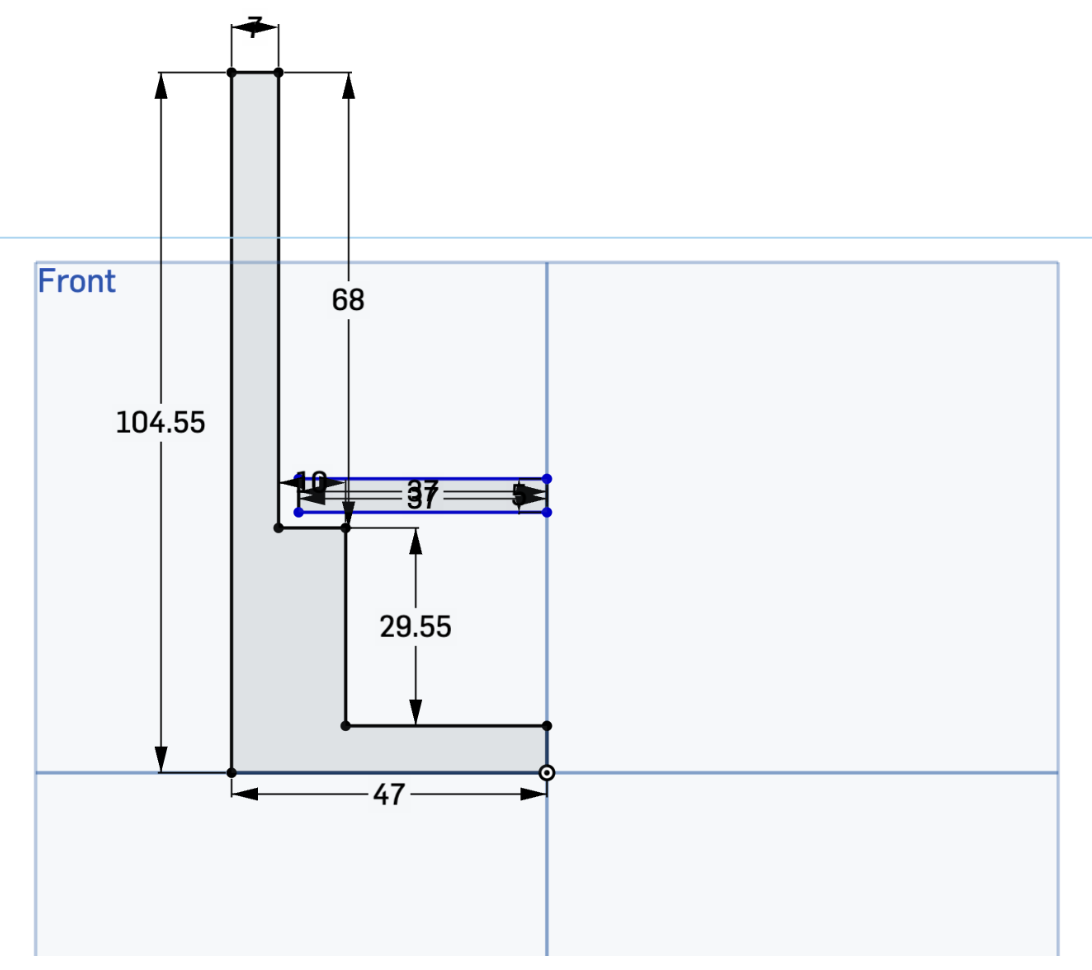
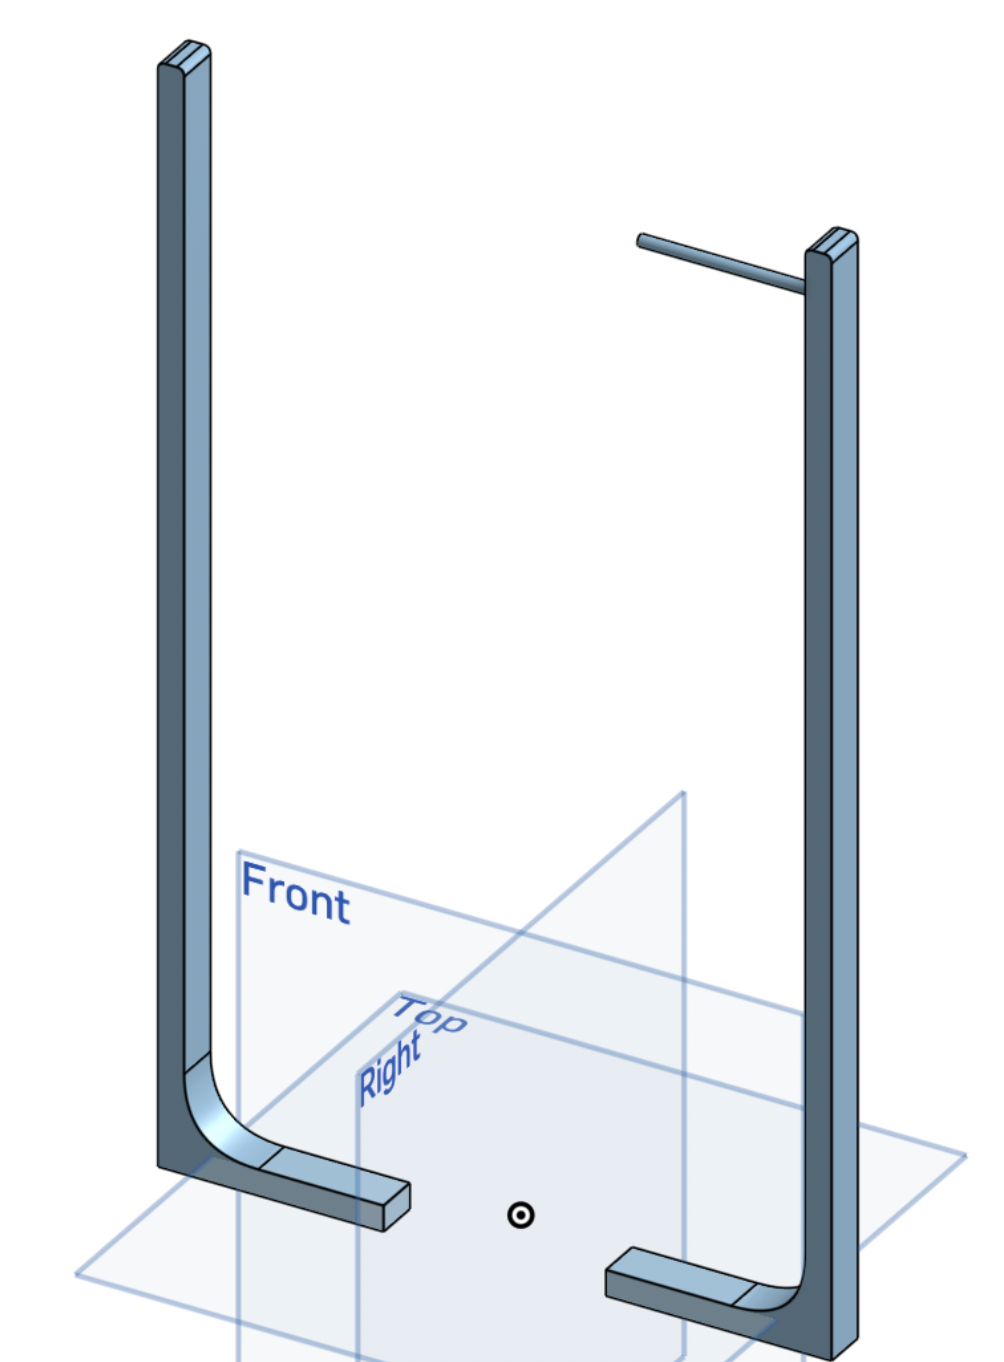
- Used OnShape software to begin 3D modeling the structure
- Built each part with precise measurements in mind to ensure proper fit and function
- Focused on stability, motor clearance, and how each part would interact when assembled
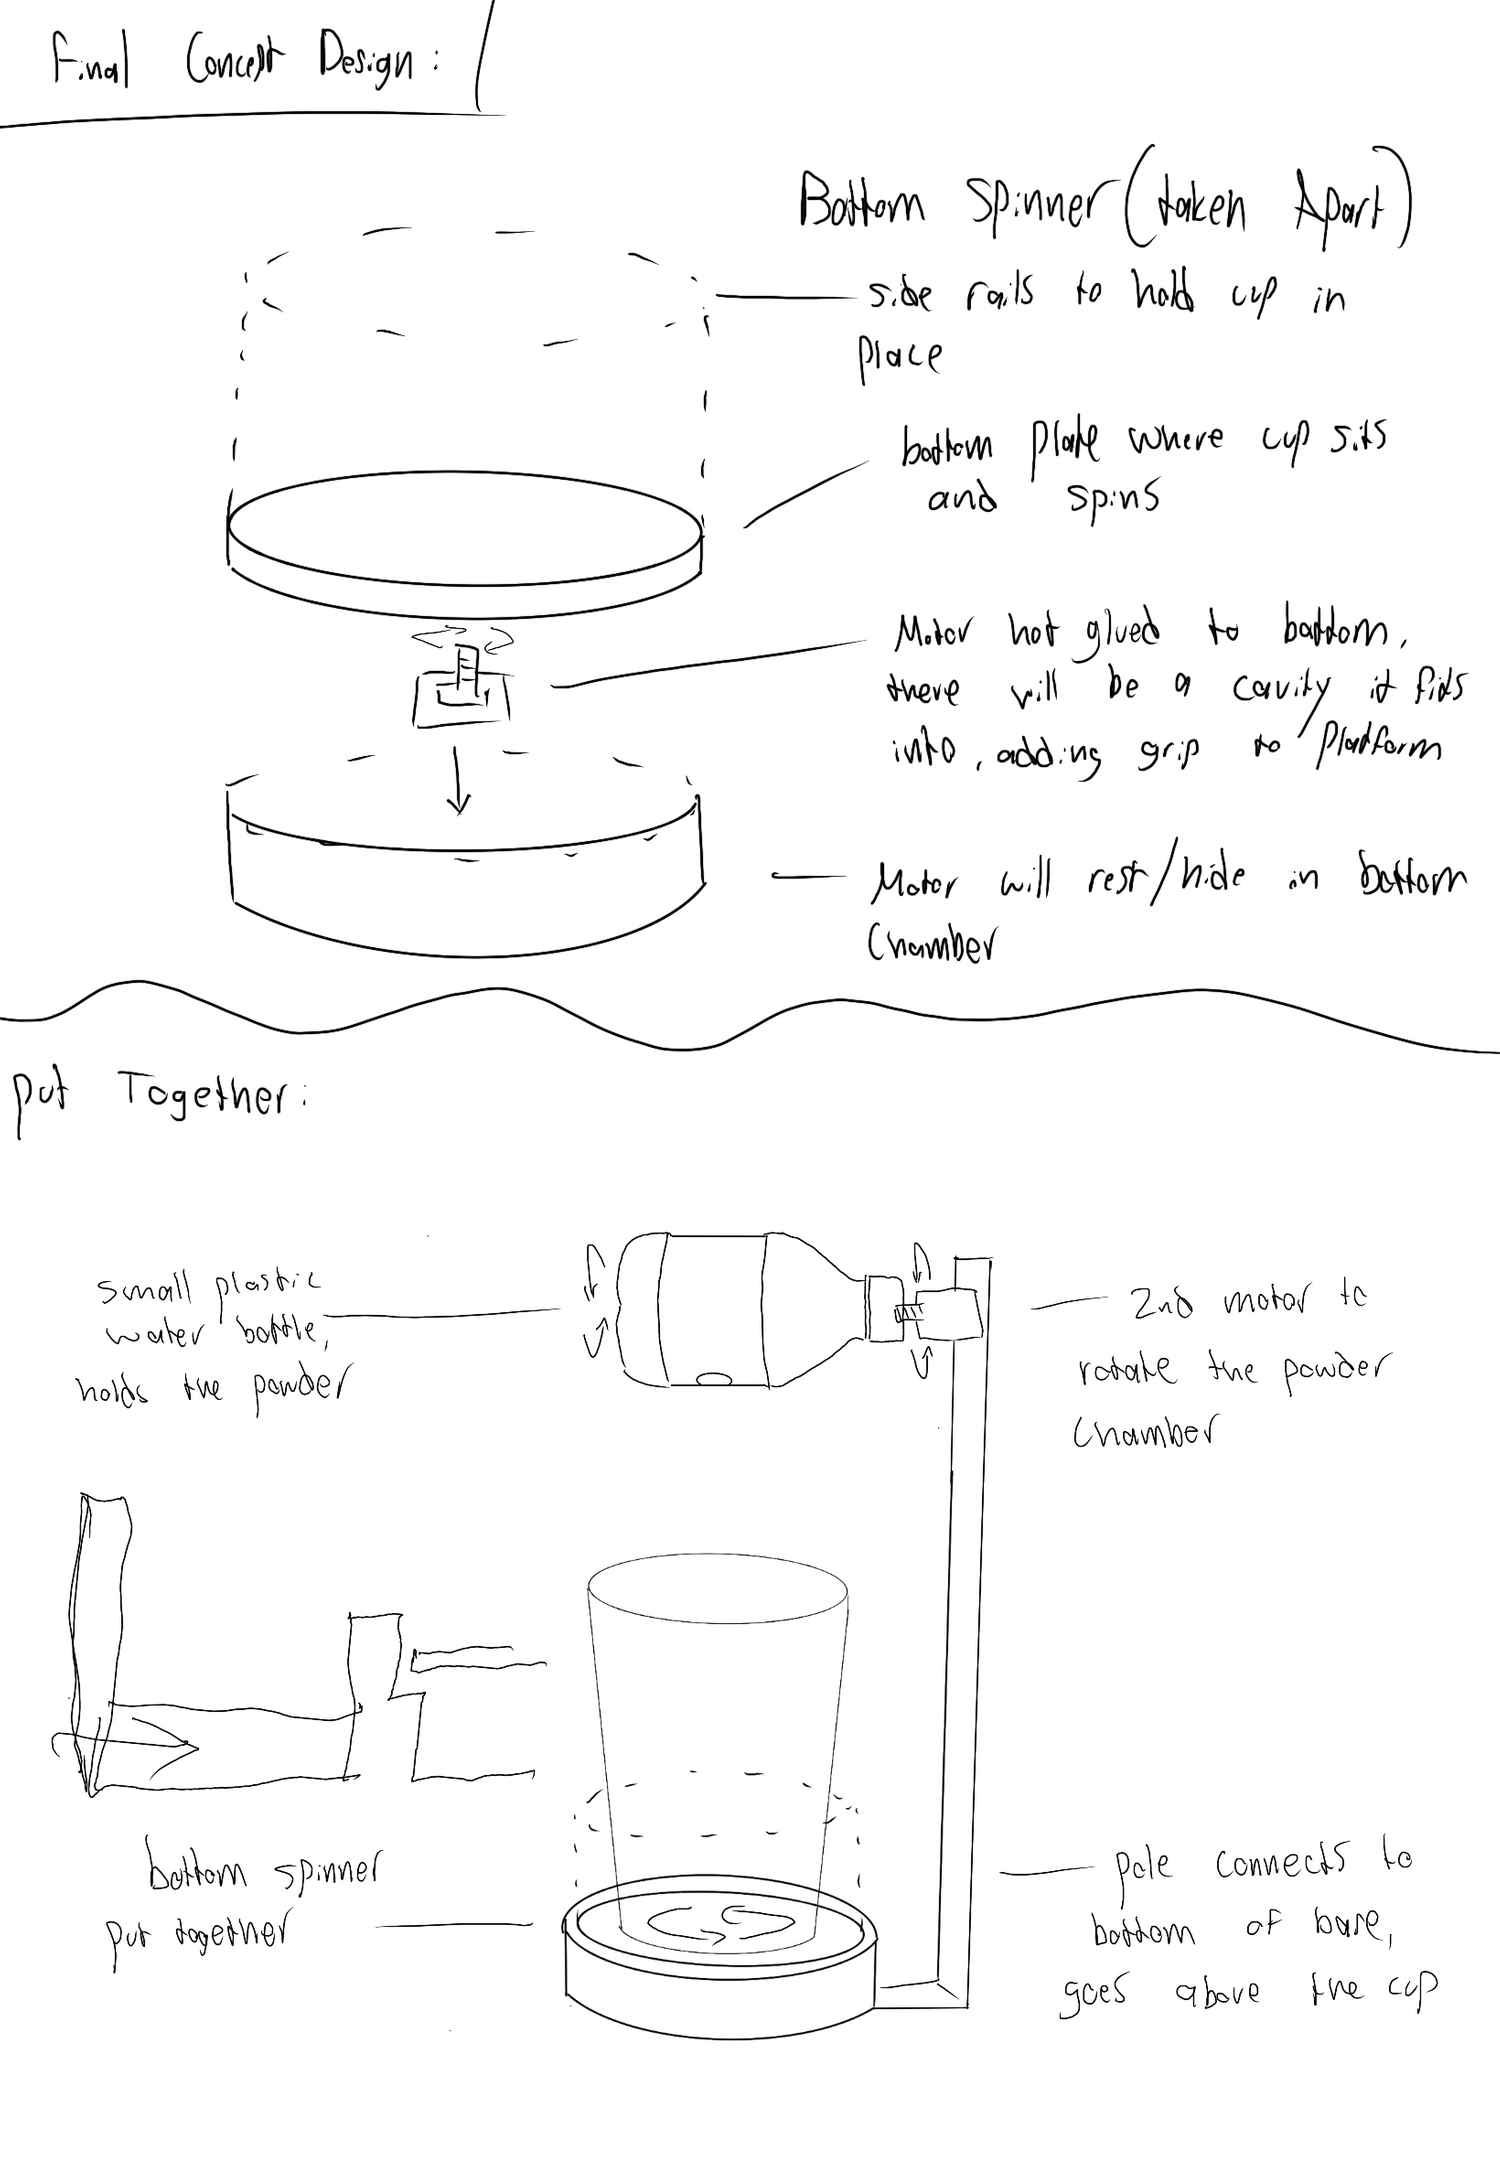
- Made a sketch that shows everything in the build, including the cup and bottle to ensure it would all fit on the first print
Next Steps:
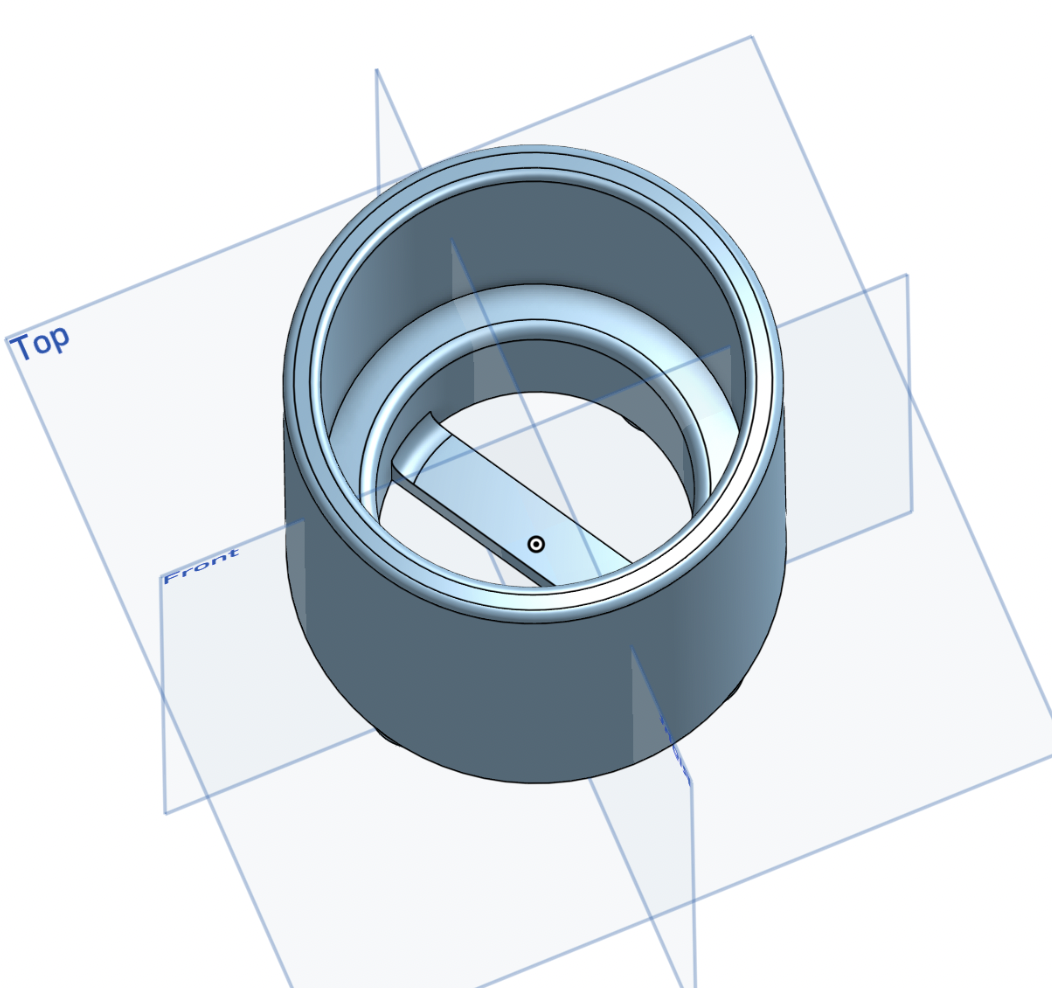
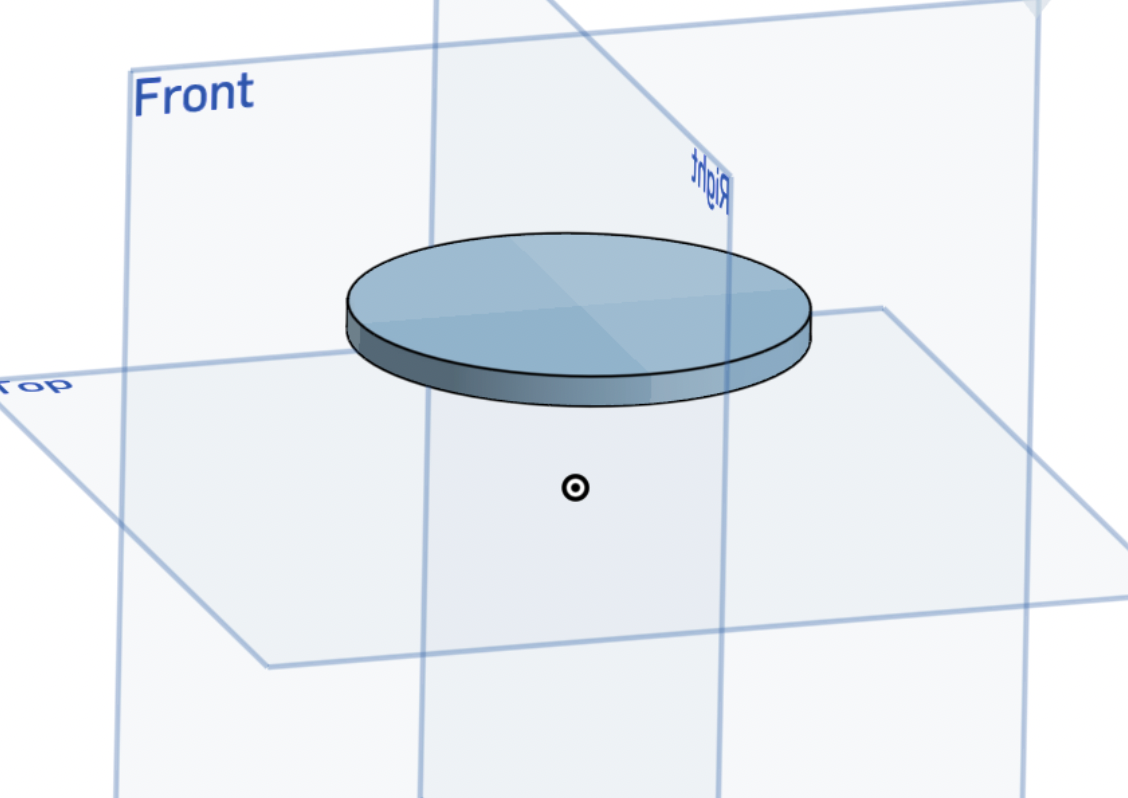
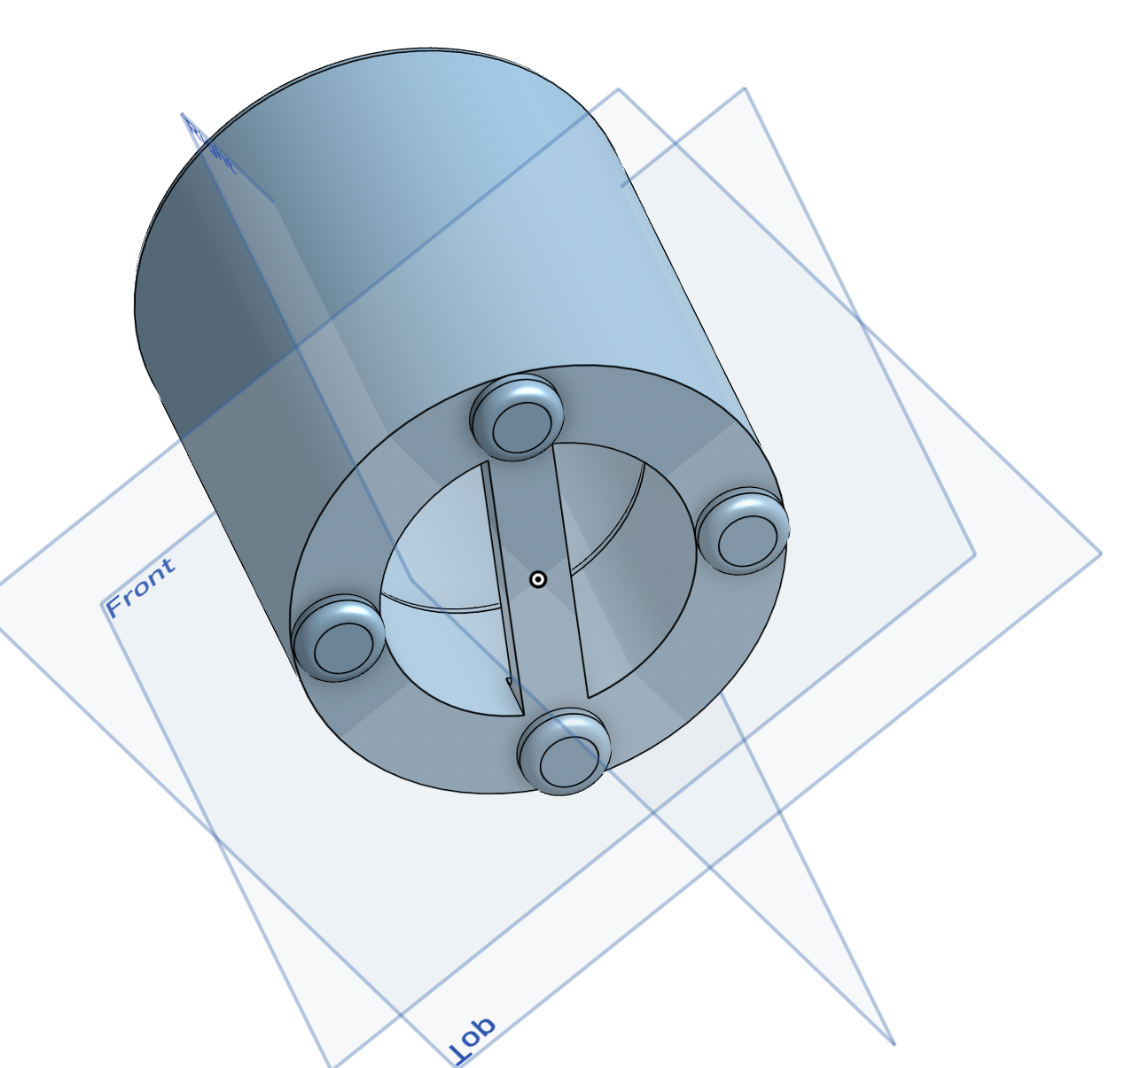
- Used revolve and extrude tools in OnShape to turn blueprint into a 3D model
- Created 3 separate files for different parts of the device
- Added 3mm of space between spinning plate and border to prevent friction and allow smooth movement
3D Modeling
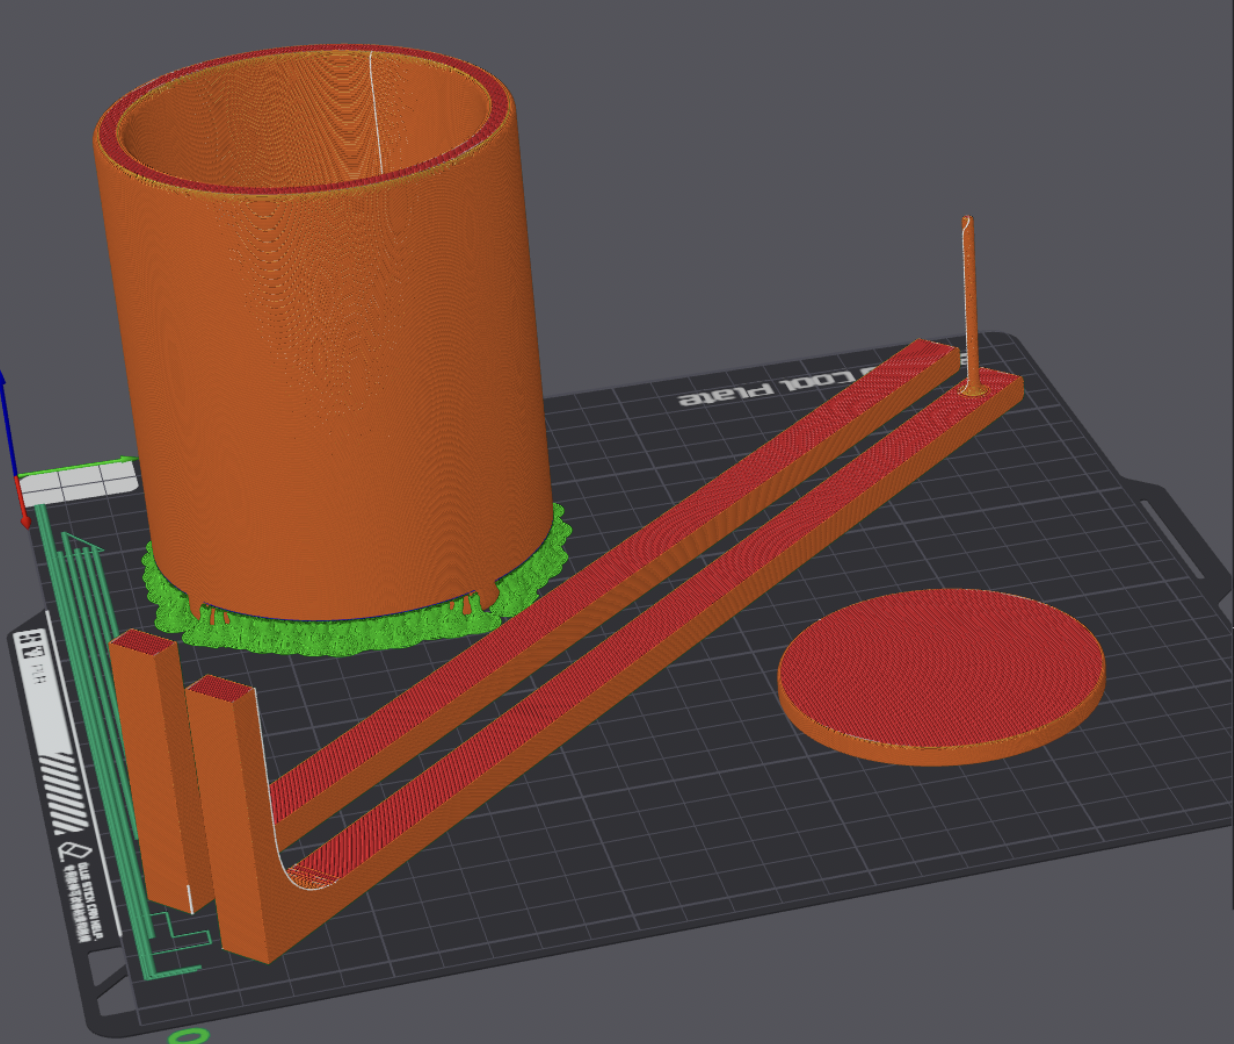
- Exported the STL file and uploaded it to Bambu Studio for 3D printing
- Arranged all pieces to print in one take
- Added supports to the main compartment and spliced the file
- Exported the spliced file and began the printing process
Printing Process
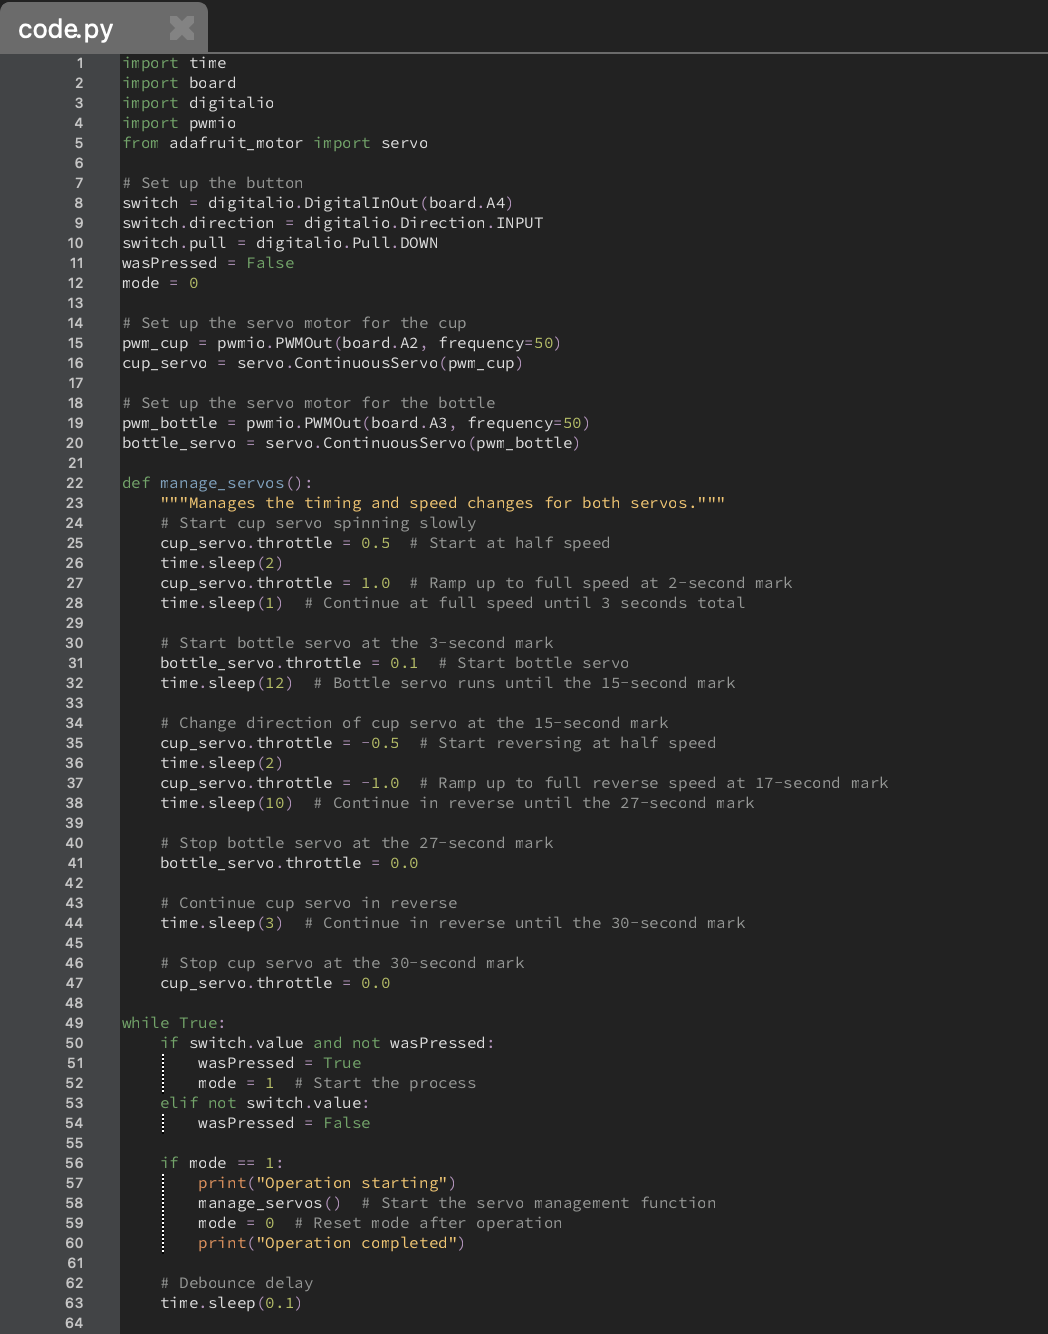
- Print finished, moved on to wiring and programming servo motors
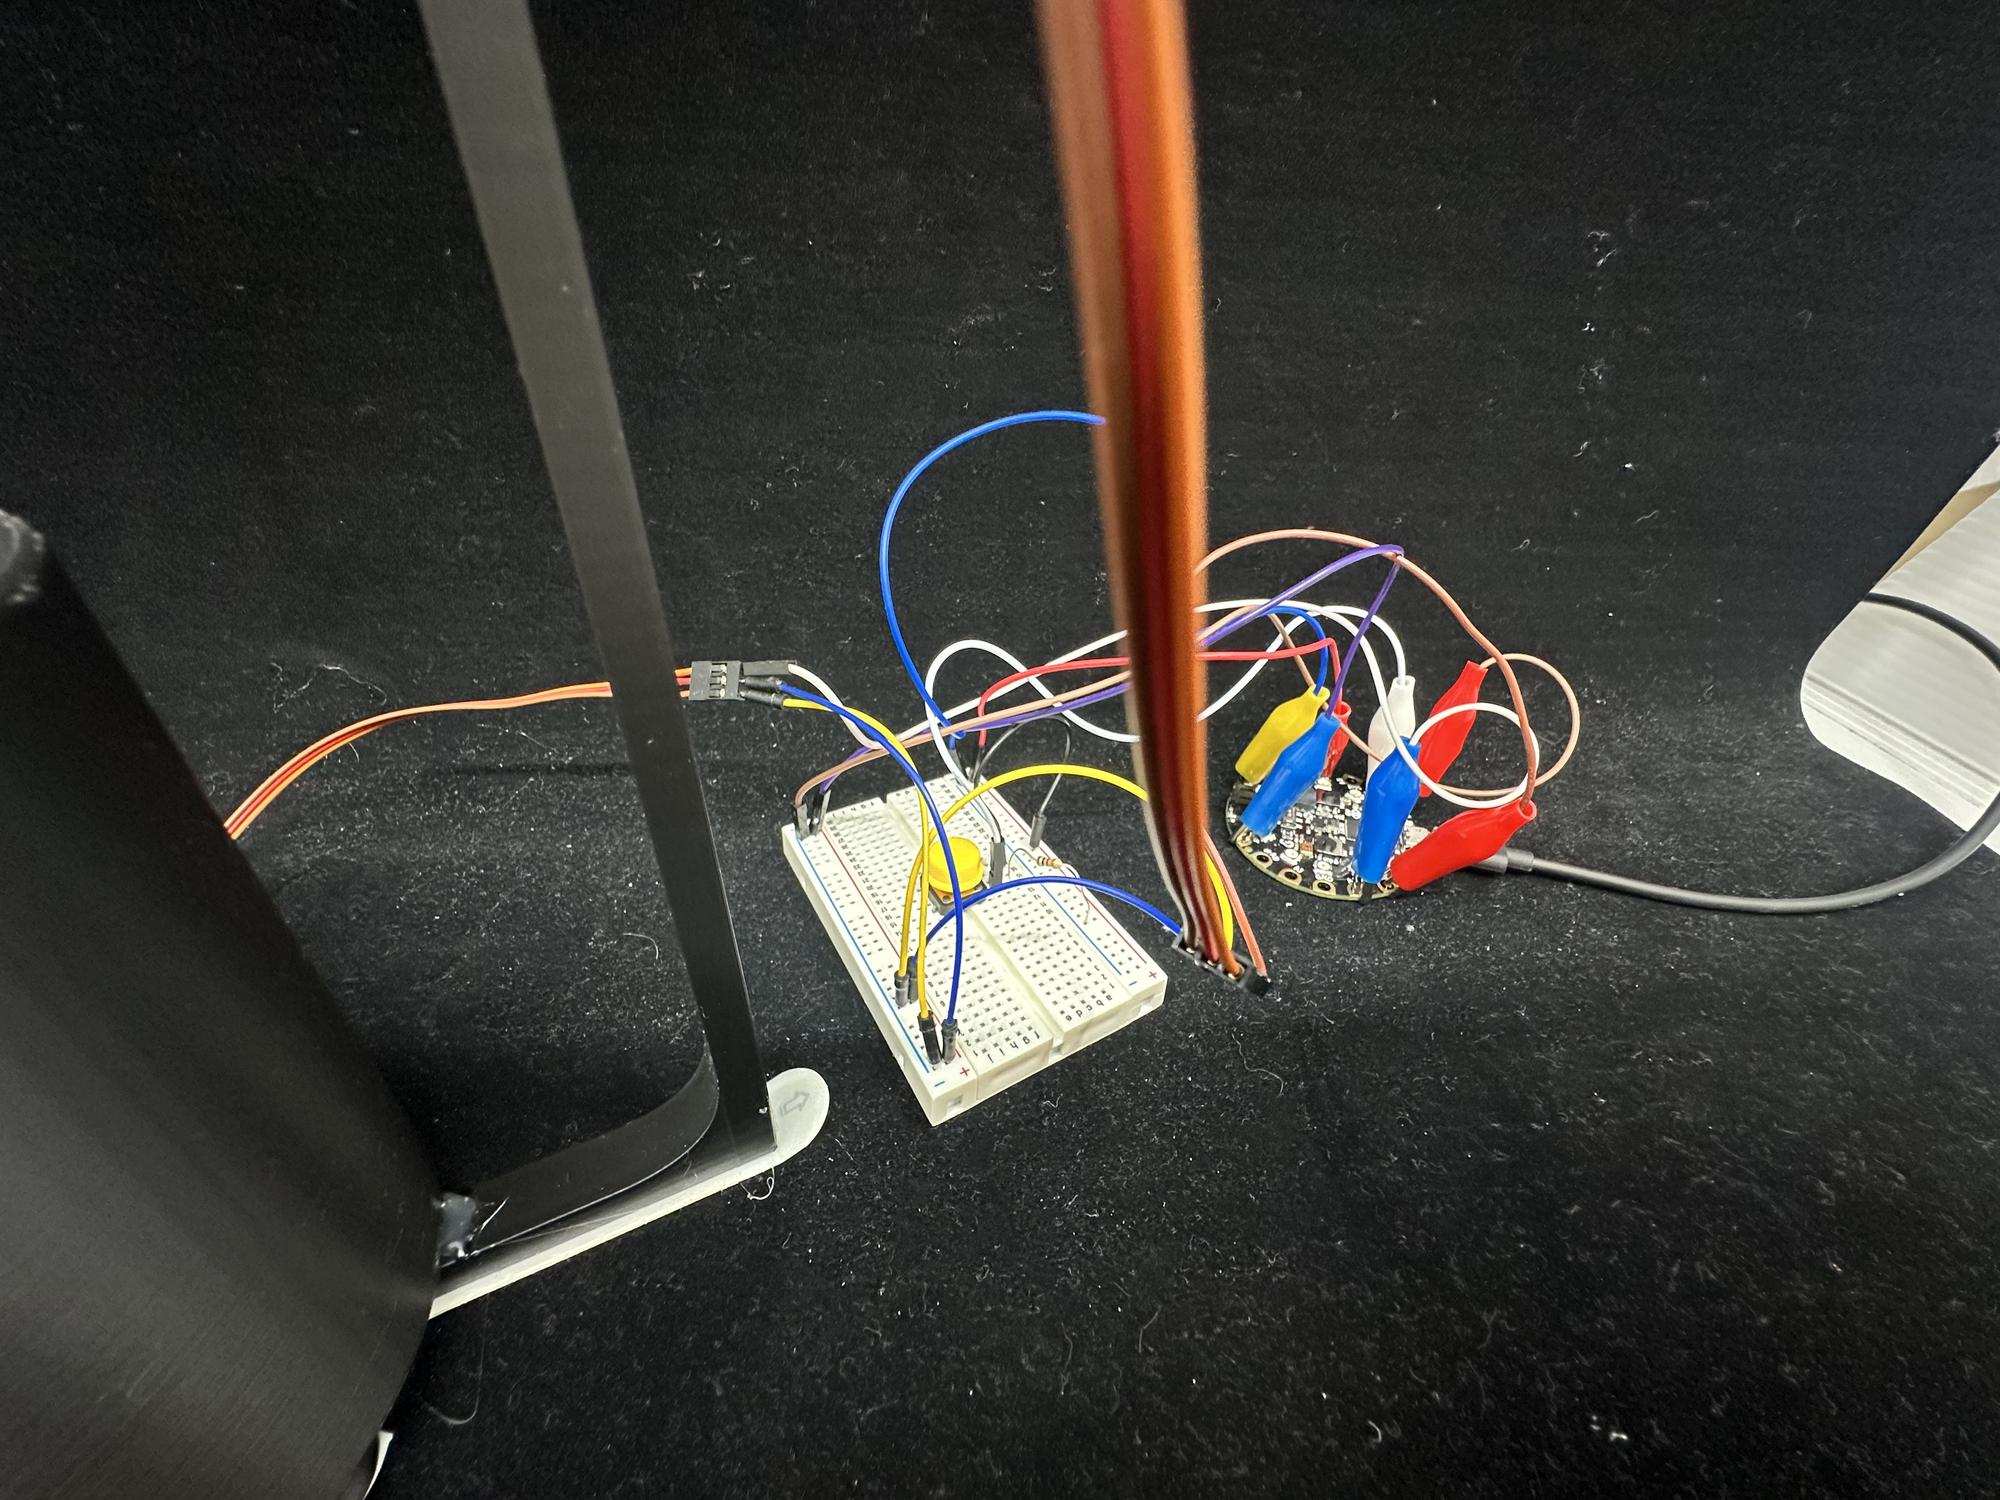
- Connected servos to Circuit Playground Express board and breadboard
- Set up process to run with a single button press
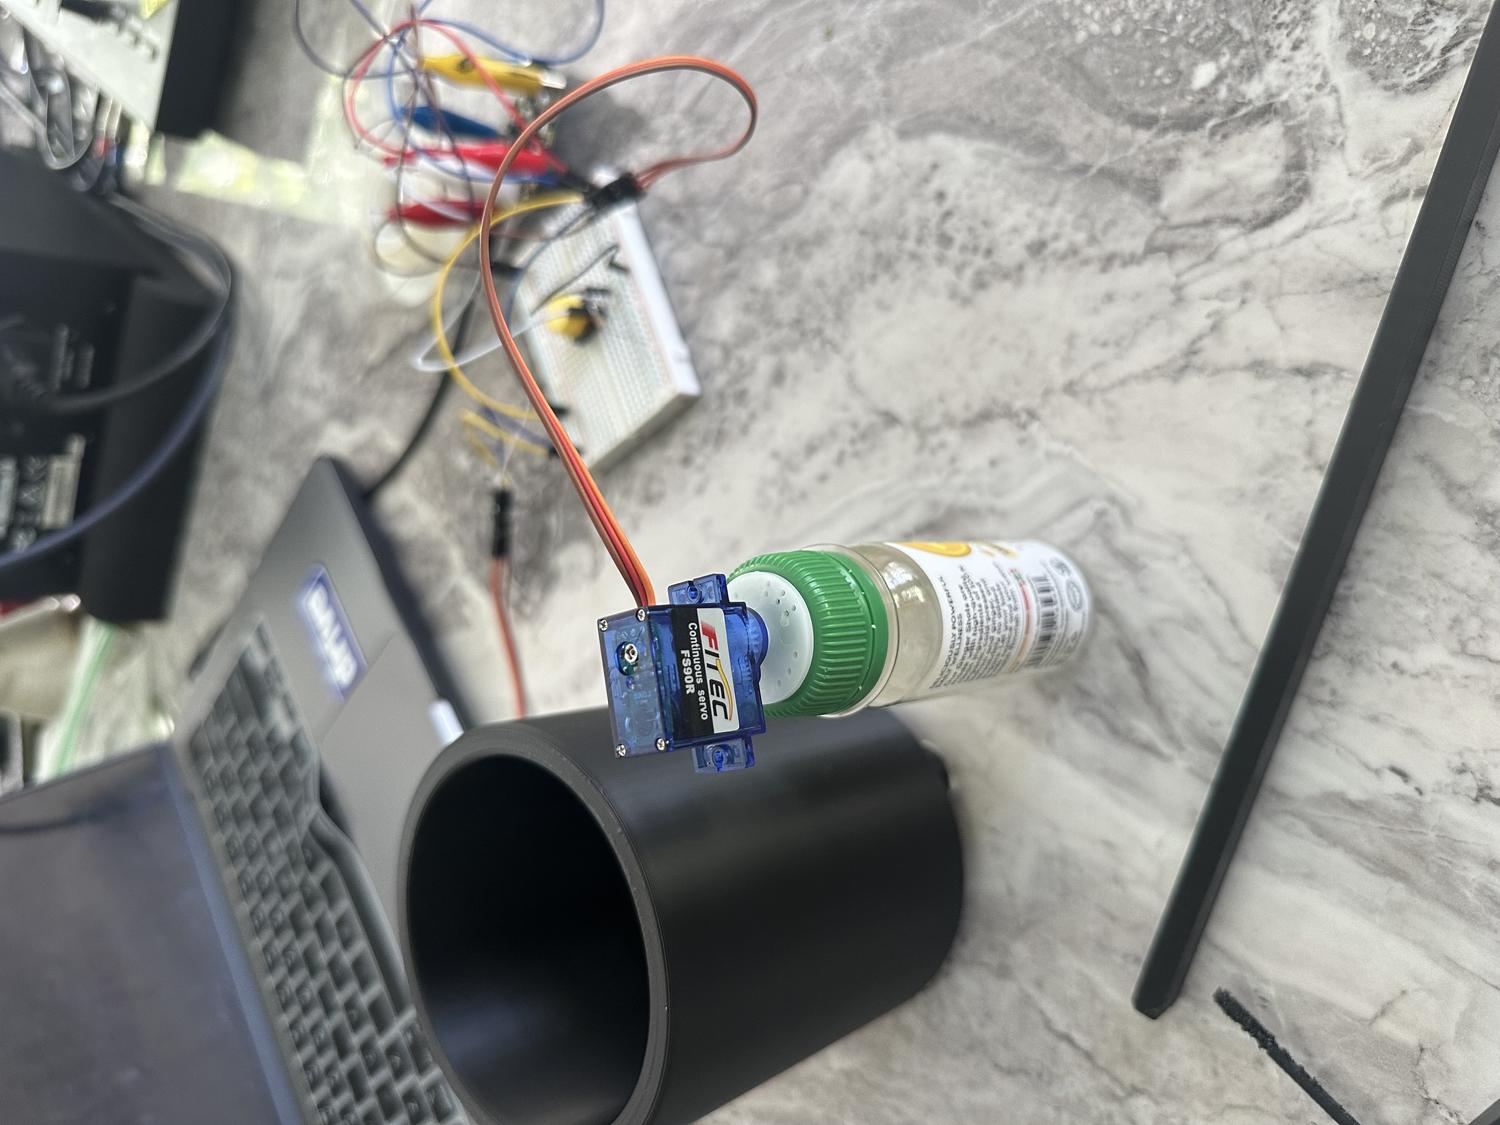
Wiring / Coding the Servos
Input:
- Button click
Output (2 outputs, 30 seconds total):
- Cup servo starts slow, then speeds up
- At 3 seconds, bottle servo starts spinning slowly to dispense powder
- At 15 seconds, cup servo reverses direction slowly, then speeds up
- At 27 seconds, bottle servo stops spinning
- At 30 seconds, cup servo stops and both servos are turned off
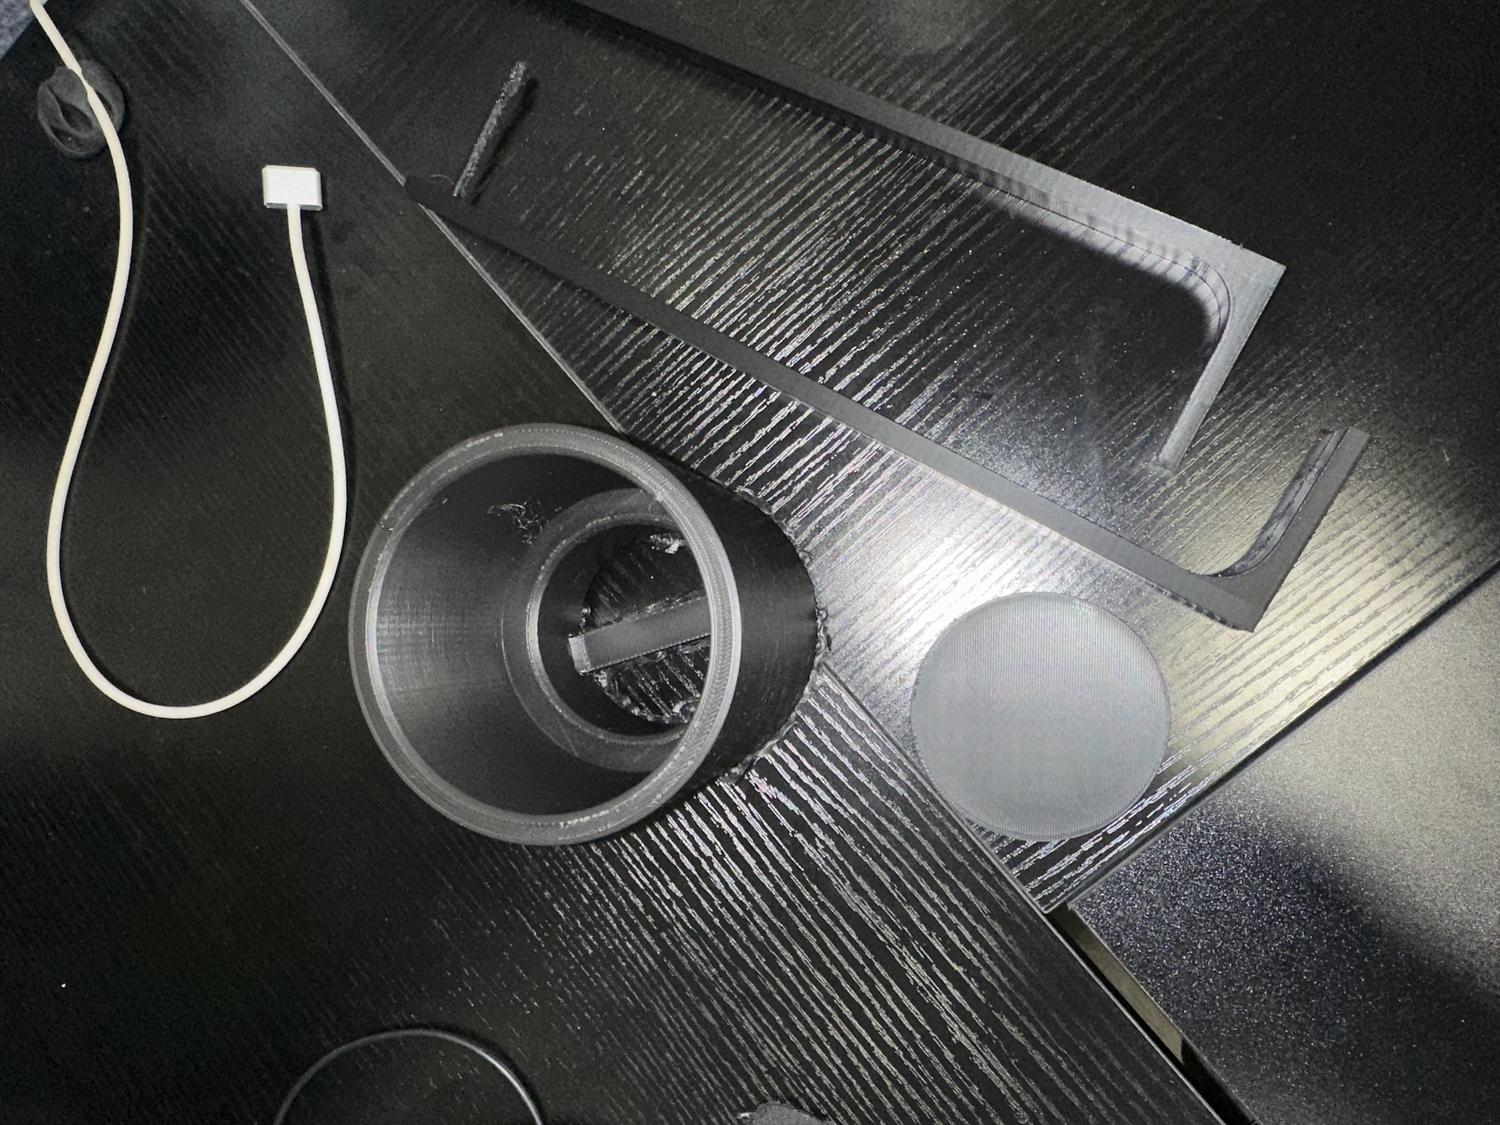
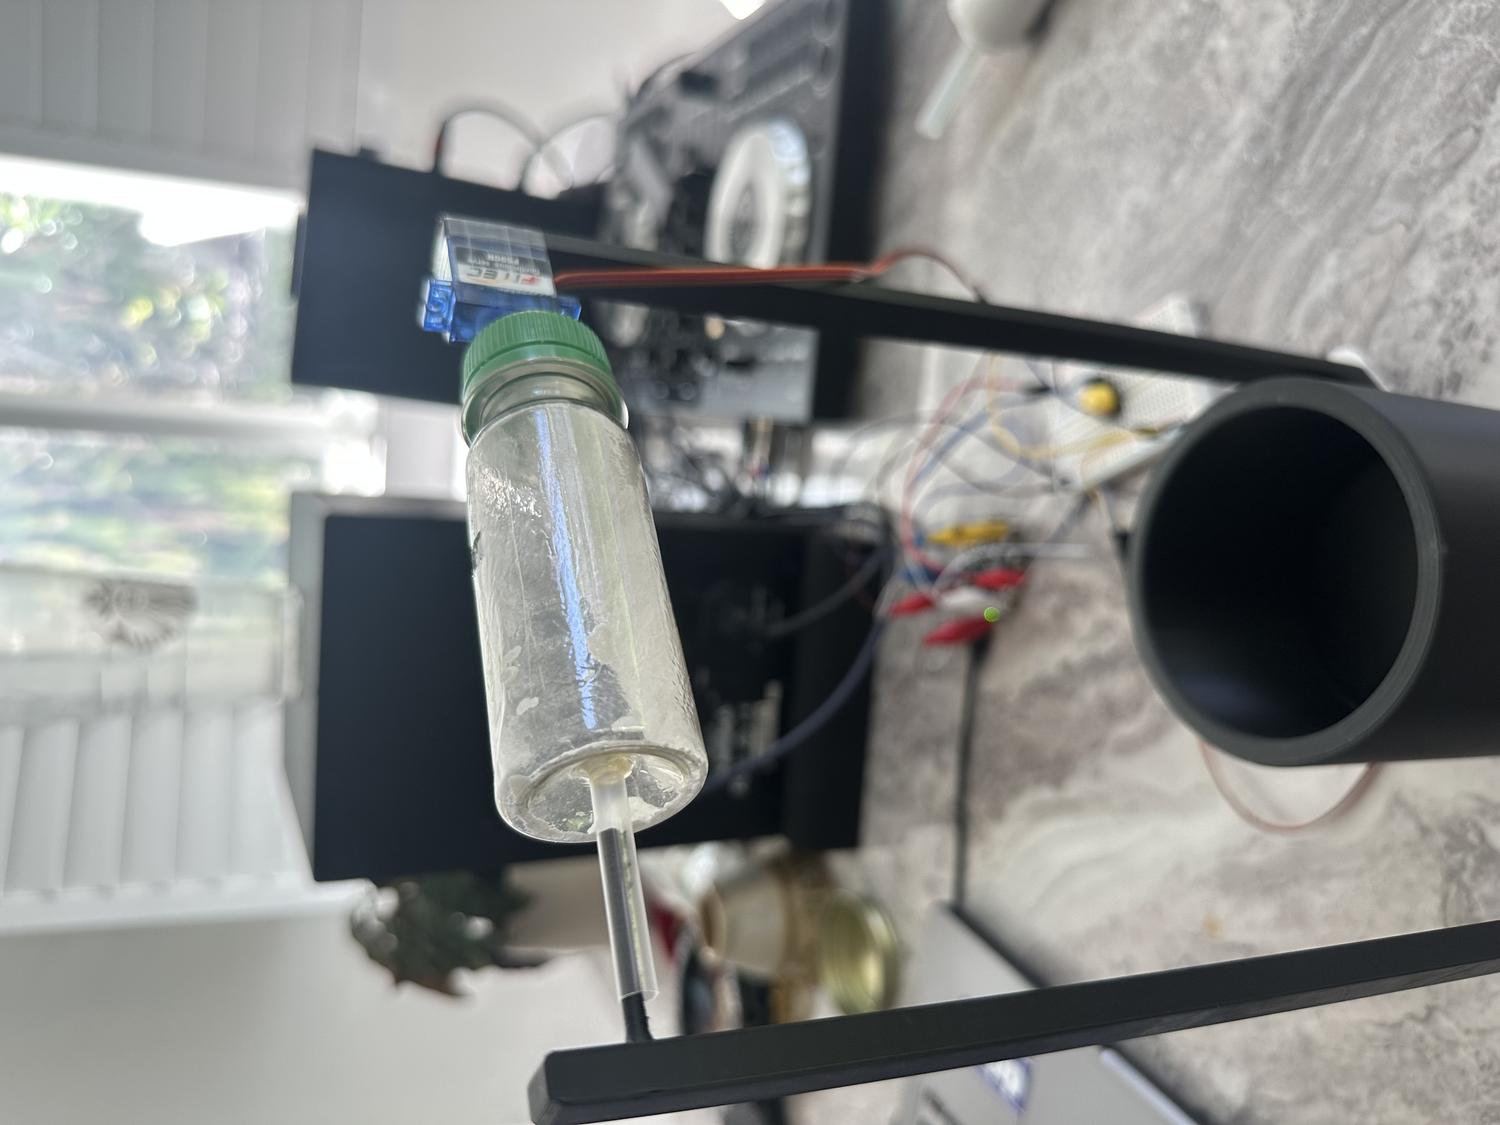
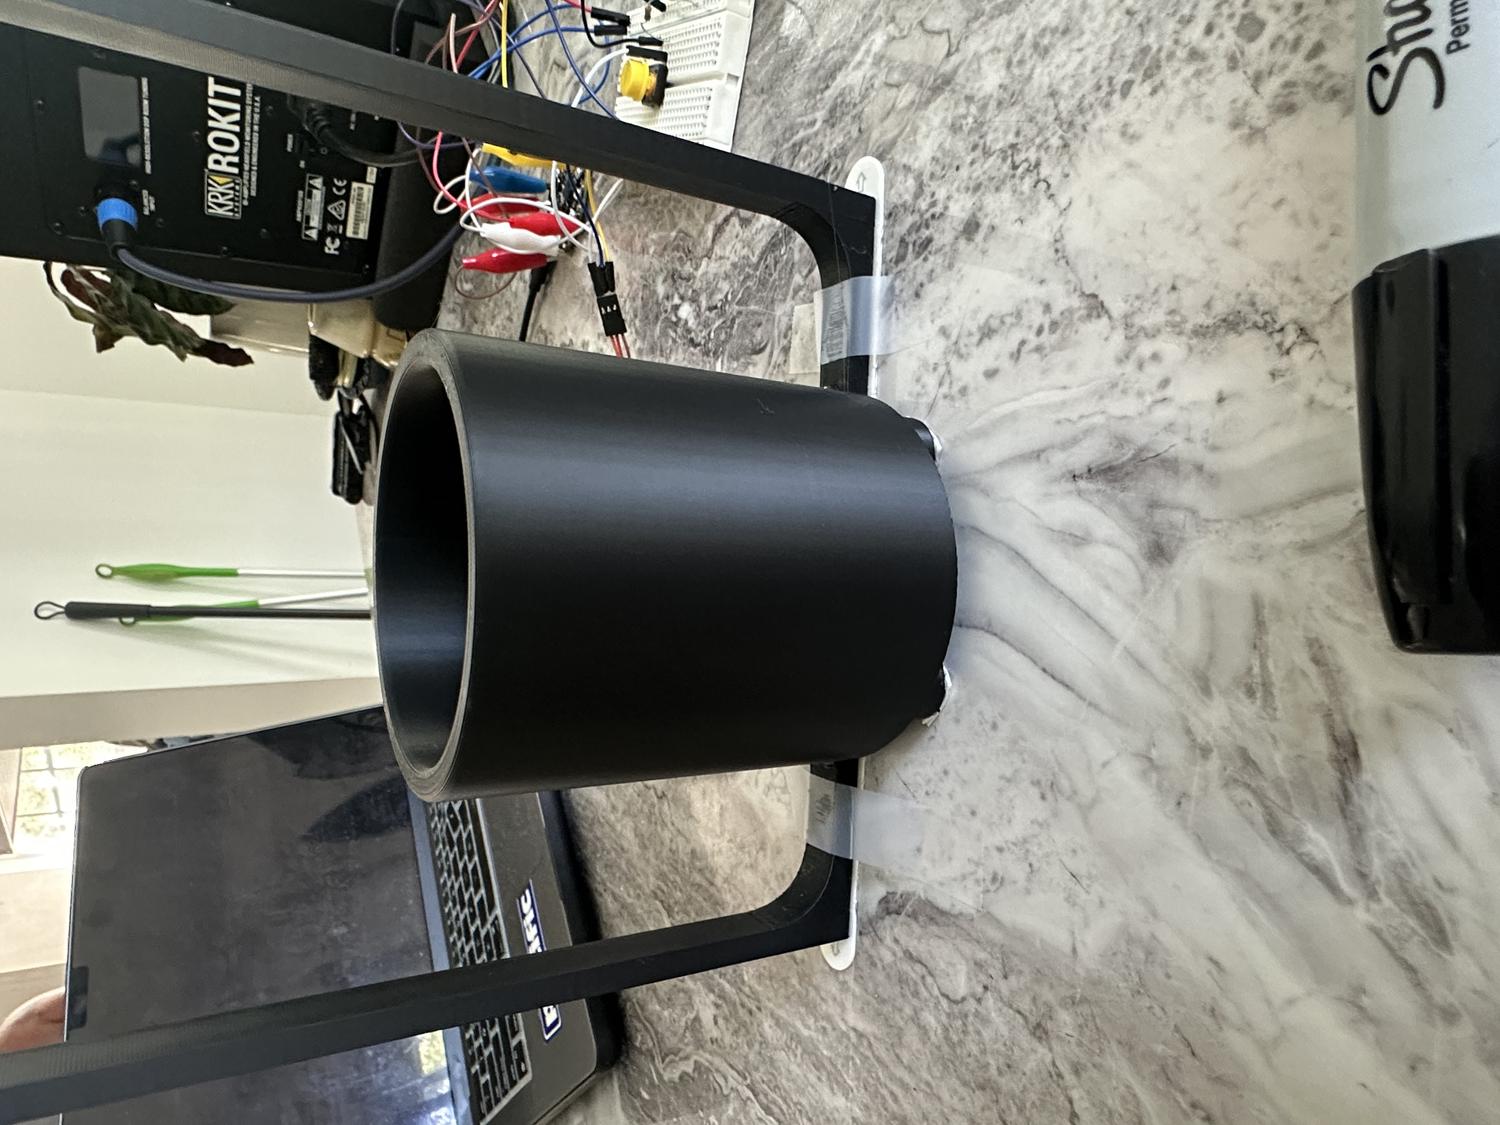
Assembly
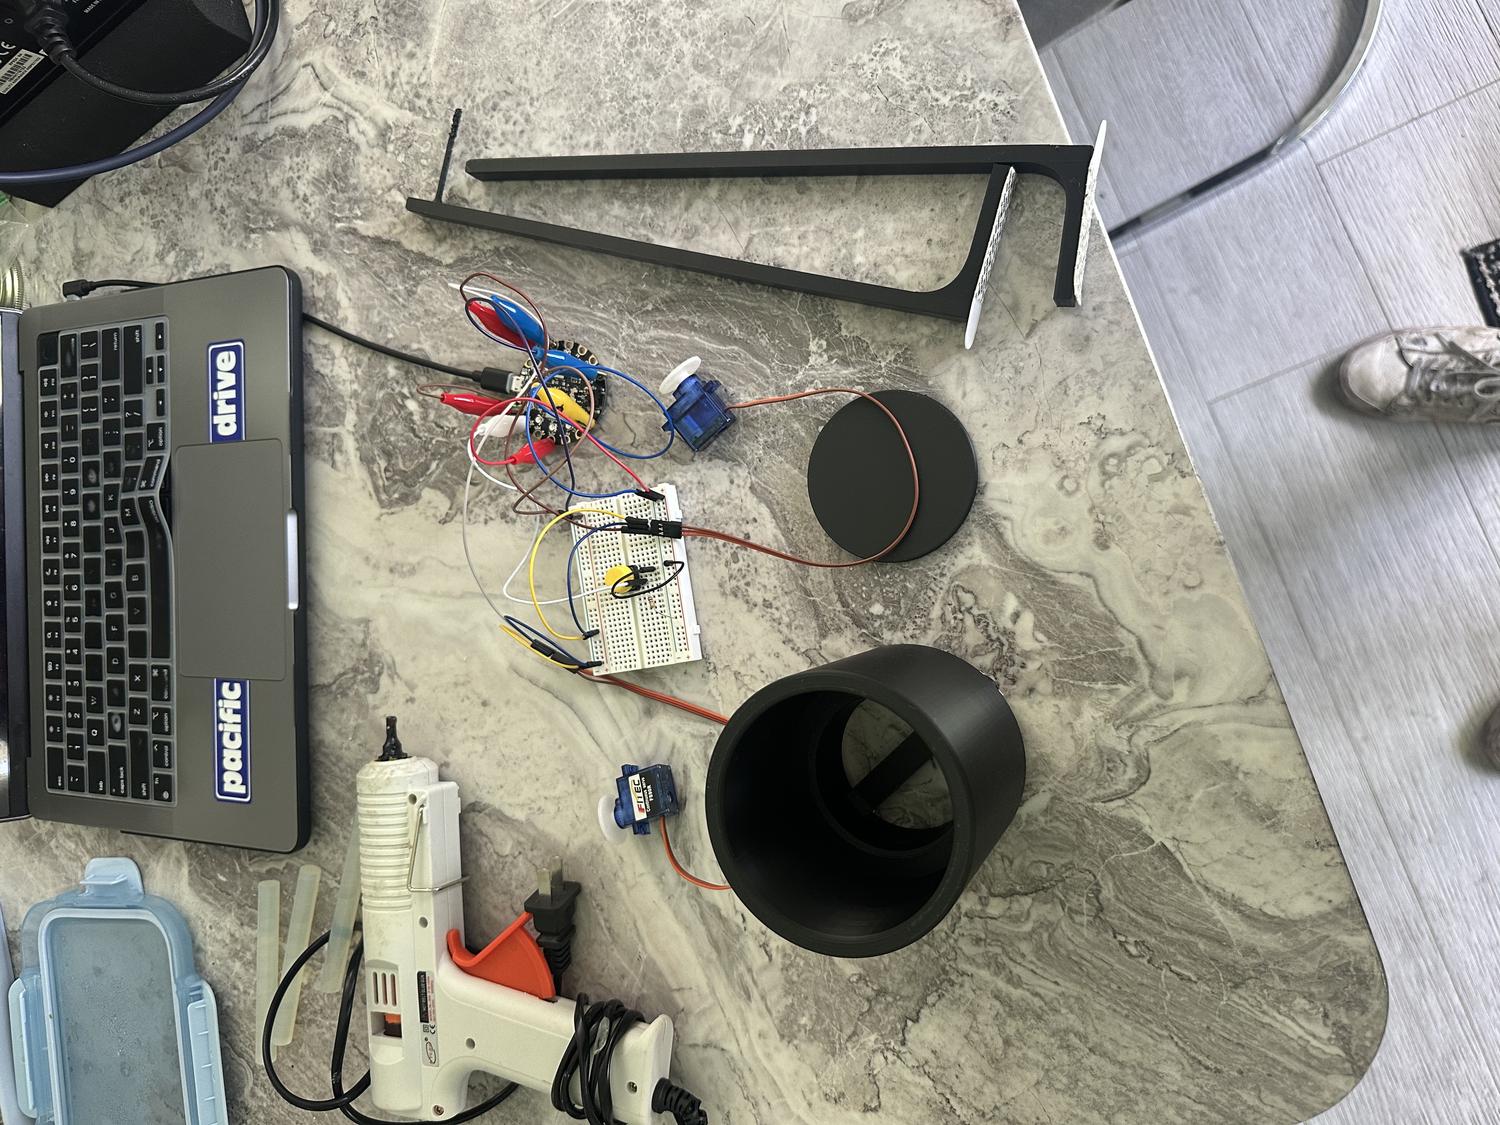
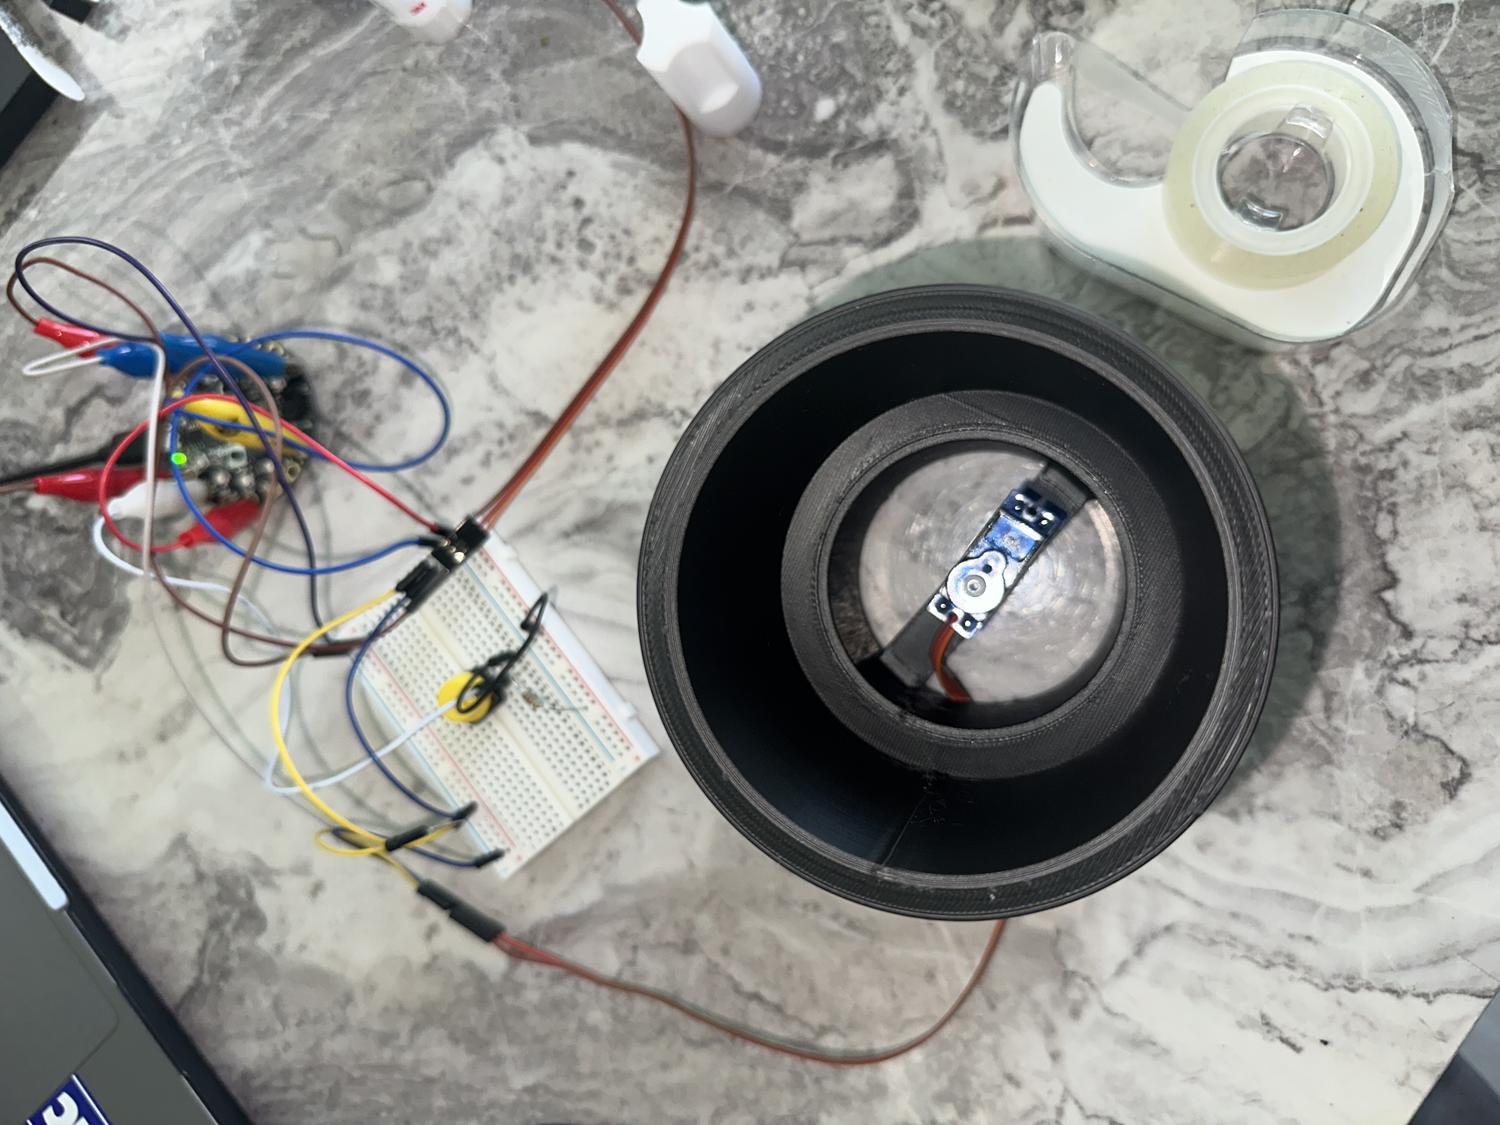
- Built from servos: hot glued caps, cup servo to coaster, bottle servo to bottle cap; taped cup to bottom chamber, bottle to support frame
- Taped feet for stability; tested after each step
- Hot glued both frames to main compartment; straw from bottle into second frame holder
- Small incision in bottle for powder—revolves to dispense one scoop; bottle stays easy to refill and remove
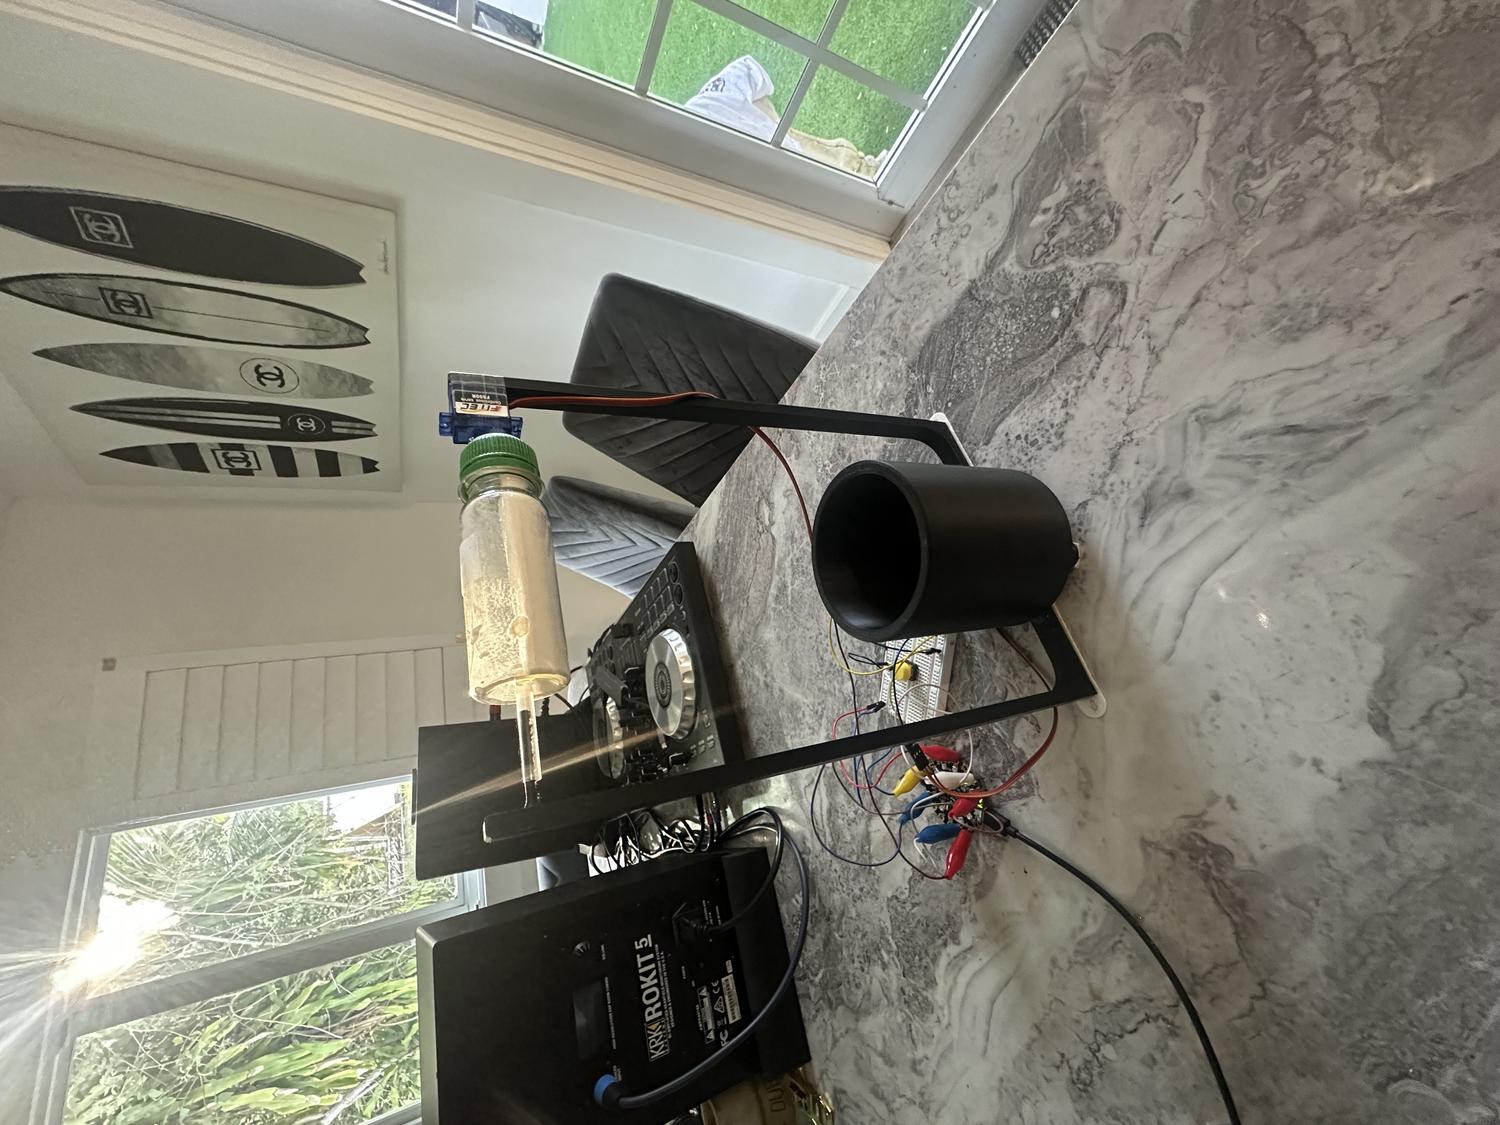
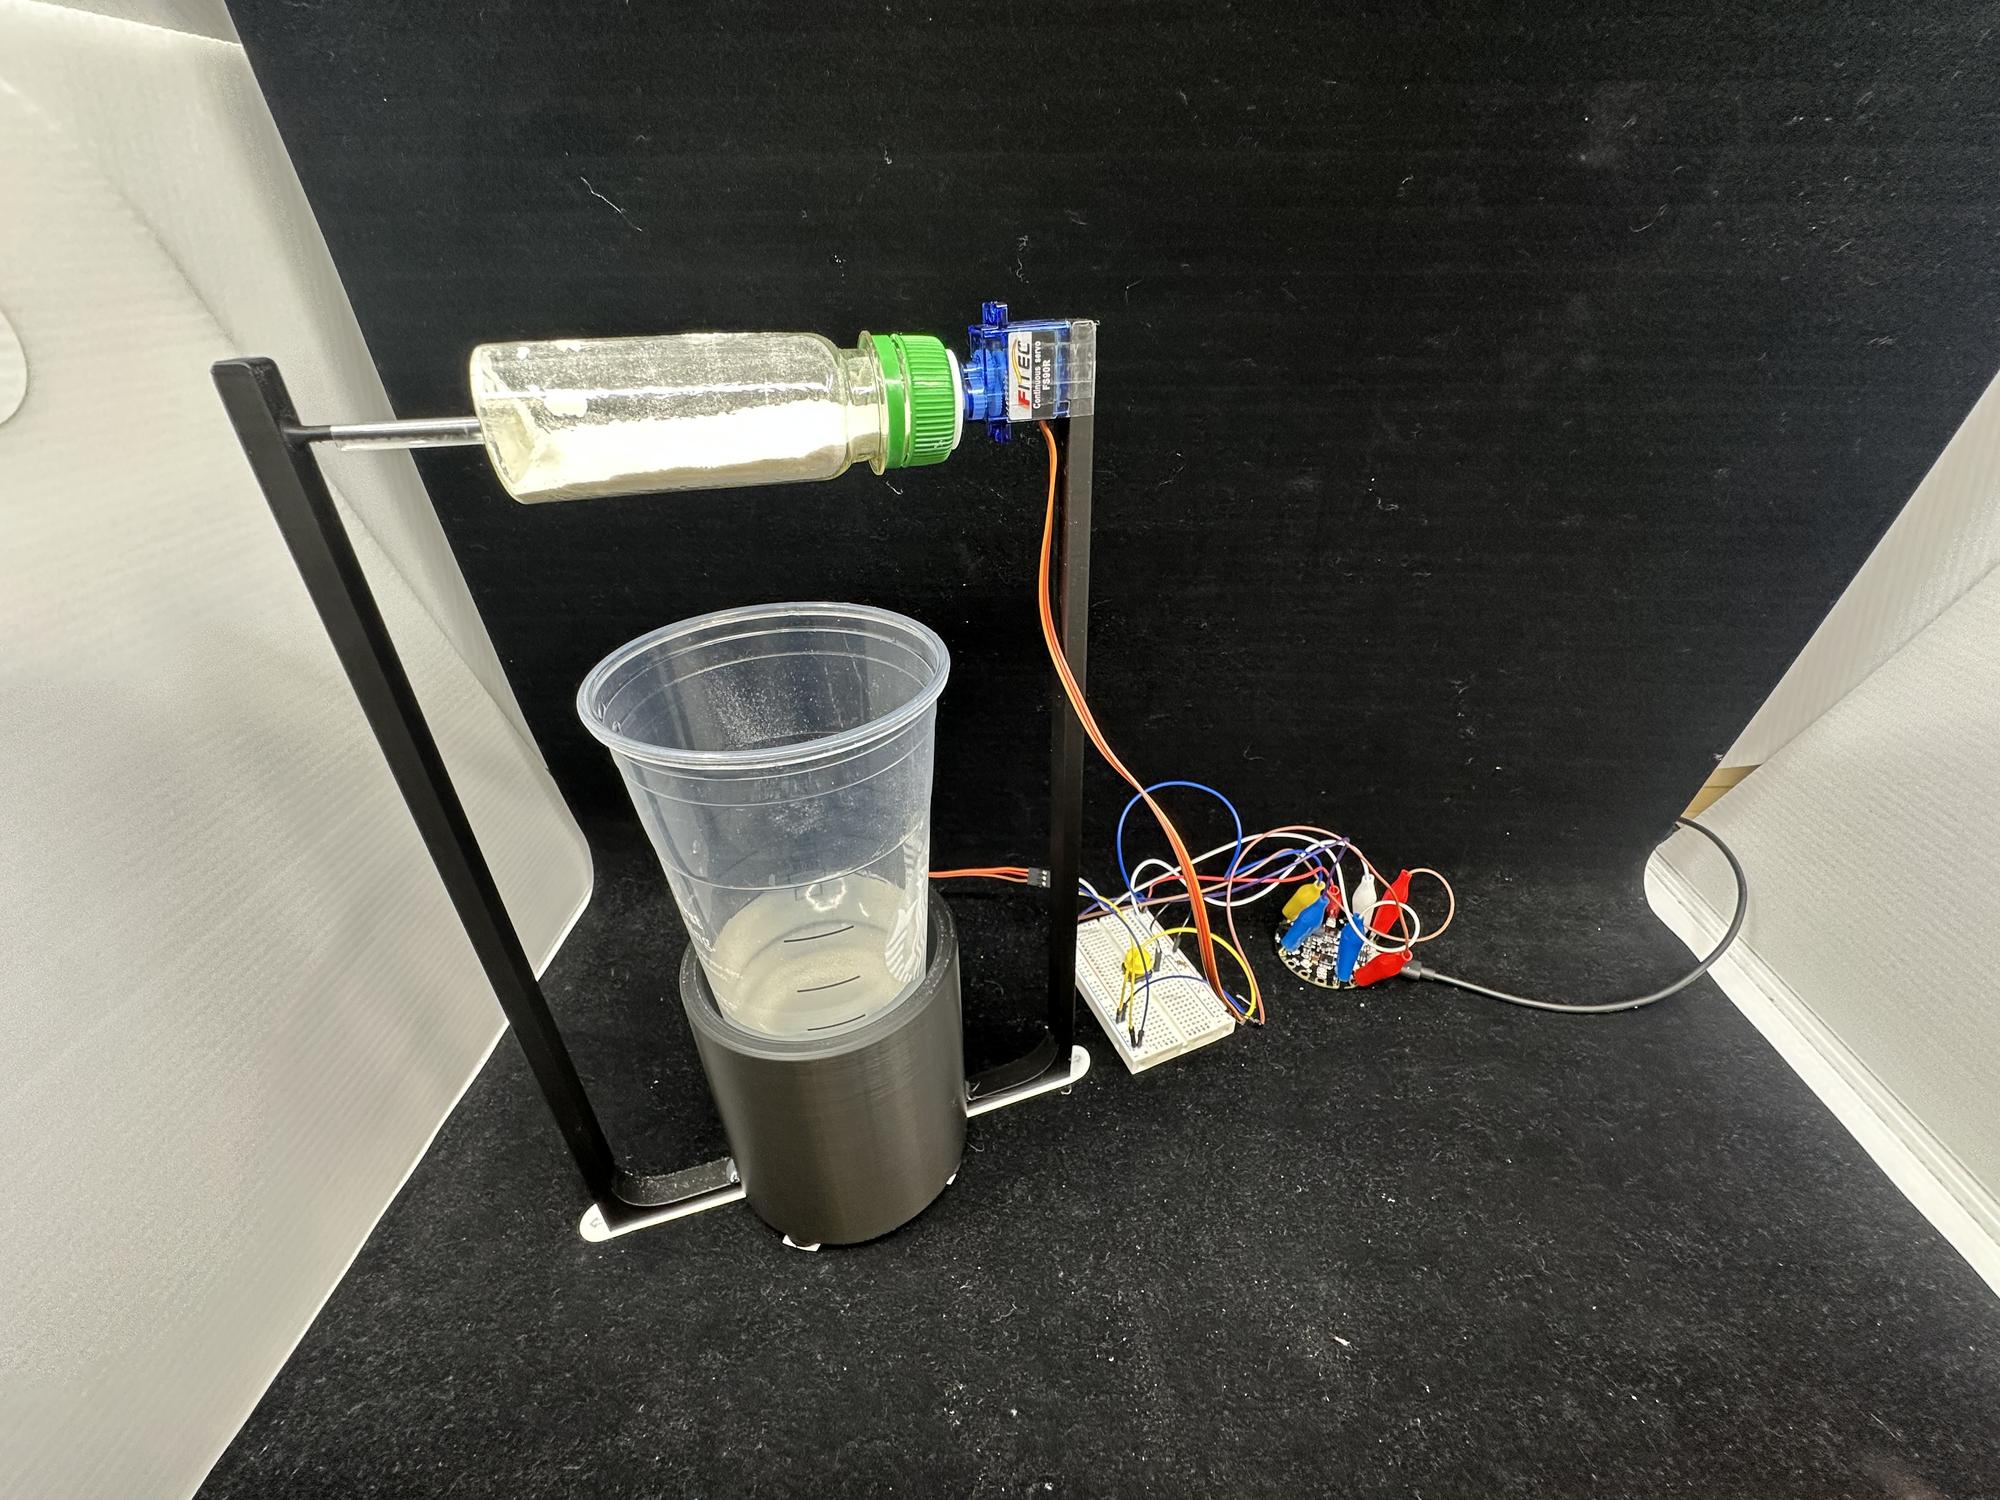
- Full test run—everything worked
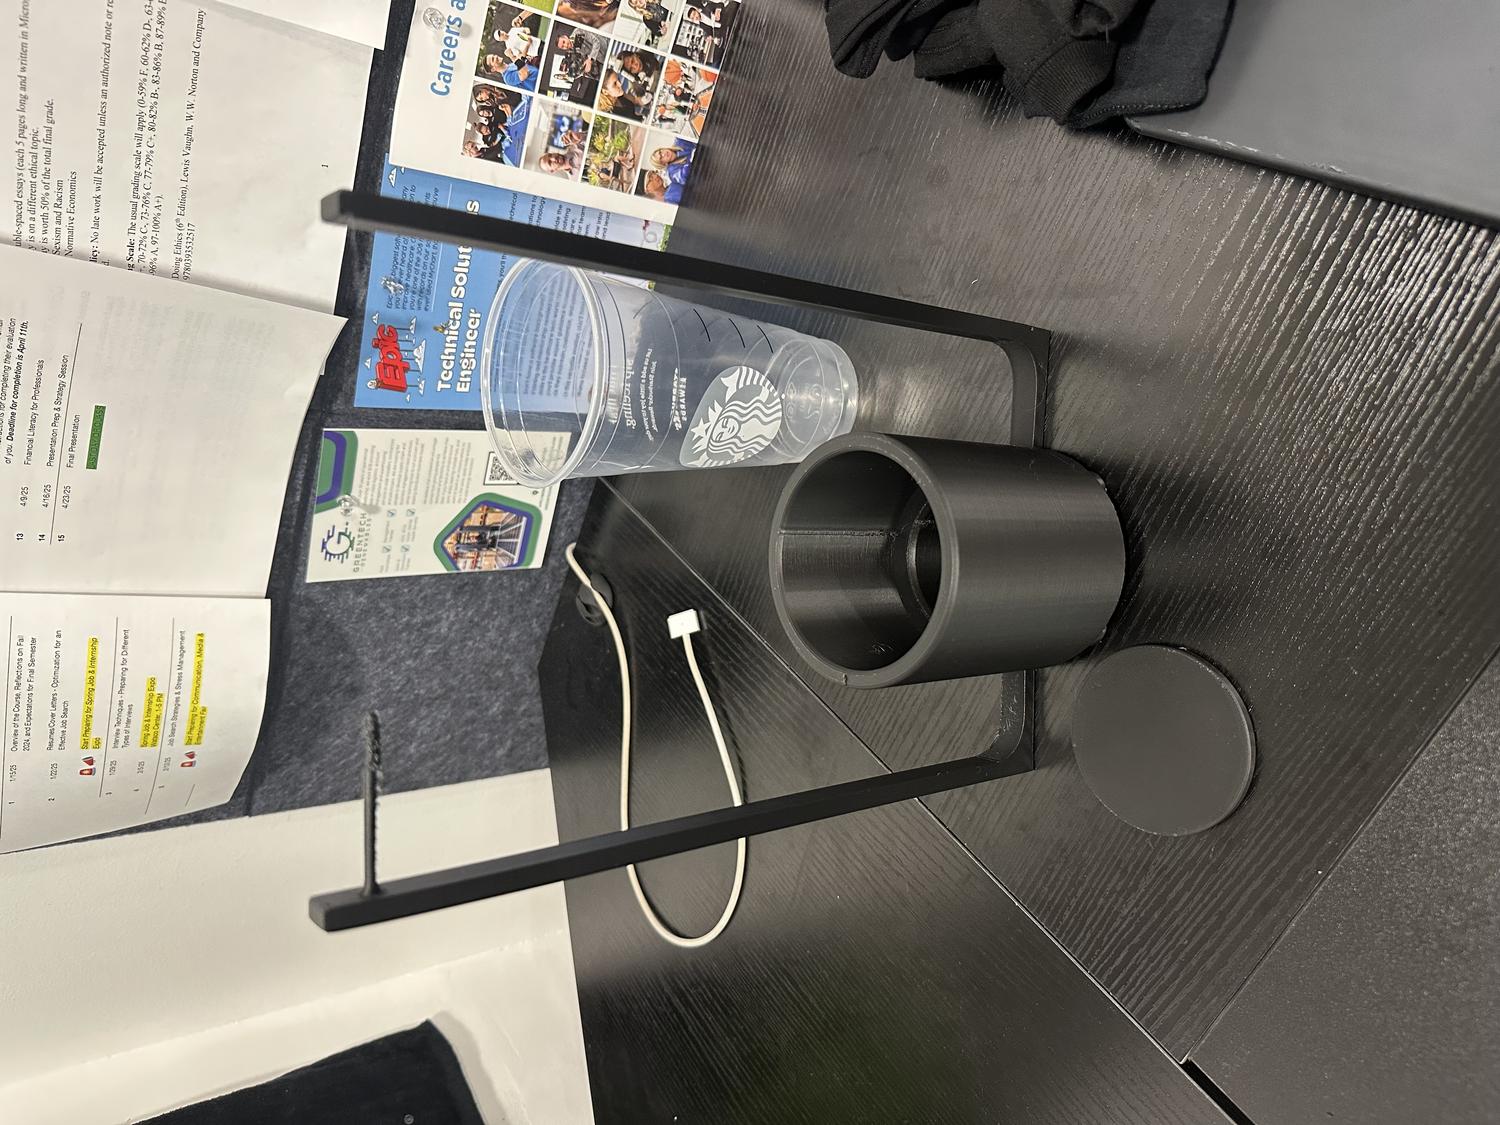
Finished Electrolyte Robot
Reflection
What Worked Well:
- Overall design is stable, nothing breaks or feels out of place
- Powder can be easily added, and the bottle is easy to remove and replace
- Servos are sturdy and stay in place with no malfunctions
Challenges & Limitations:
- Servo motors have limited power and can only reach a certain speed
- Mixing effect isn't strong enough to fully stir the water as intended
- Hole in the bottle could finish rotation upside down, releasing powder when turned off
Takeaways:
- The goal was to build a device that may or may not be a helpful robot
- In this case, it's not extremely helpful due to limited servo speed
- Future versions could include faster, more powerful motors
- Despite limitations, this was a successful first prototype that met the core design goals